The steps to create or edit a form using weForms are very simple. This is due to the drag-and-drop nature of the editing sidebar and the flexible nature of the editor. You can use the sidebar to add form elements, move them by simply dragging them into place, and then adjust the field properties of each.
This tutorial will walk you through creating or editing a form, describe the difference between the free and Pro versions in terms of the Sidebar, and show how you can change the properties of the form elements in the sidebar.
- Creating or Editing a Form
- Adding Fields Using the Sidebar in weForms
- Editing the Field Options in the Sidebar
- The Difference Between the Free Version and Pro Version Using the Sidebar
Creating or Editing a Form
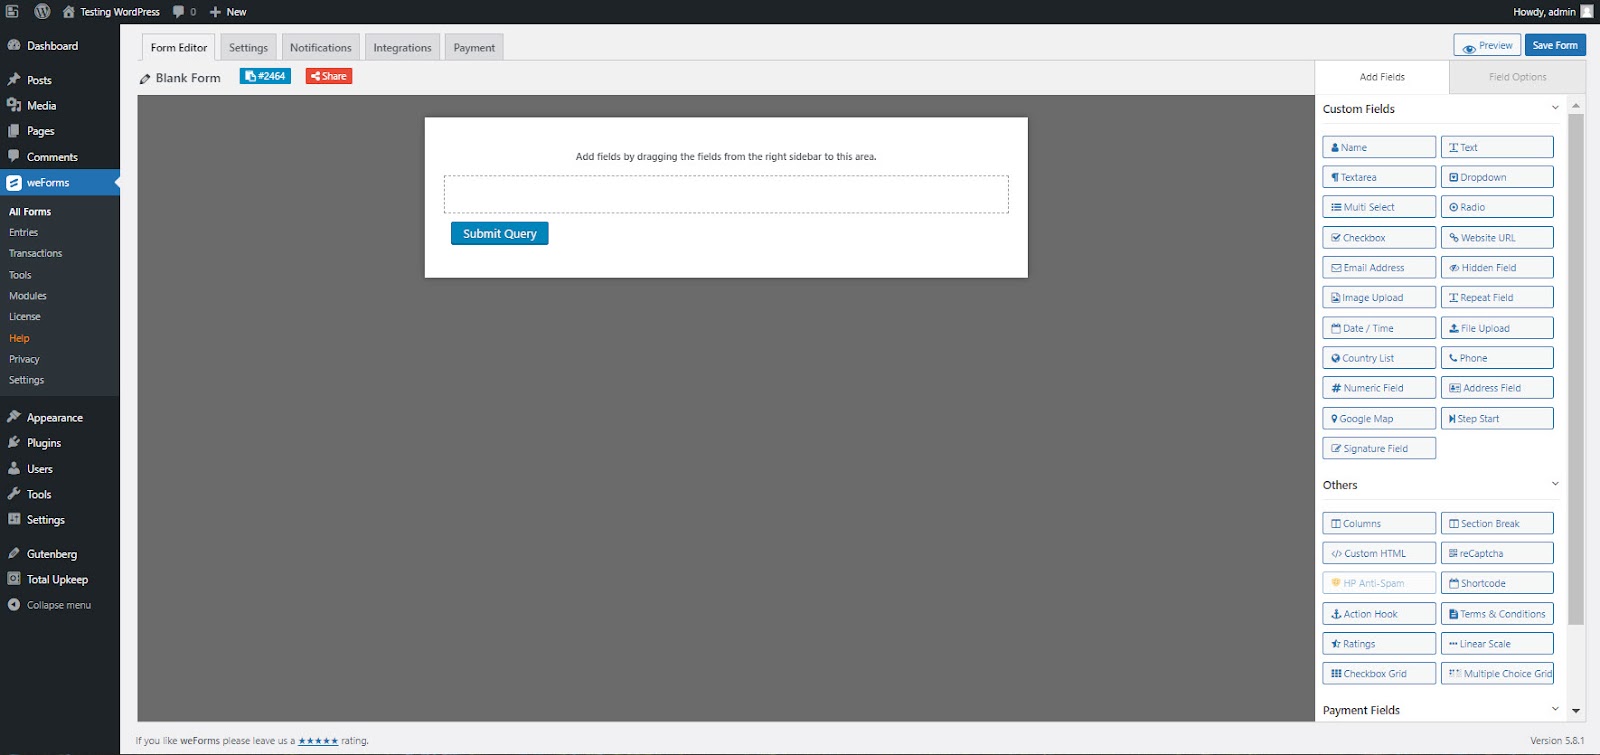
Creating or editing a form in weForms is very easy. The editor in weForms uses a sidebar that allows you quickly find and add or edit the elements of your form. Follow the steps to create a new form or edit an existing one:
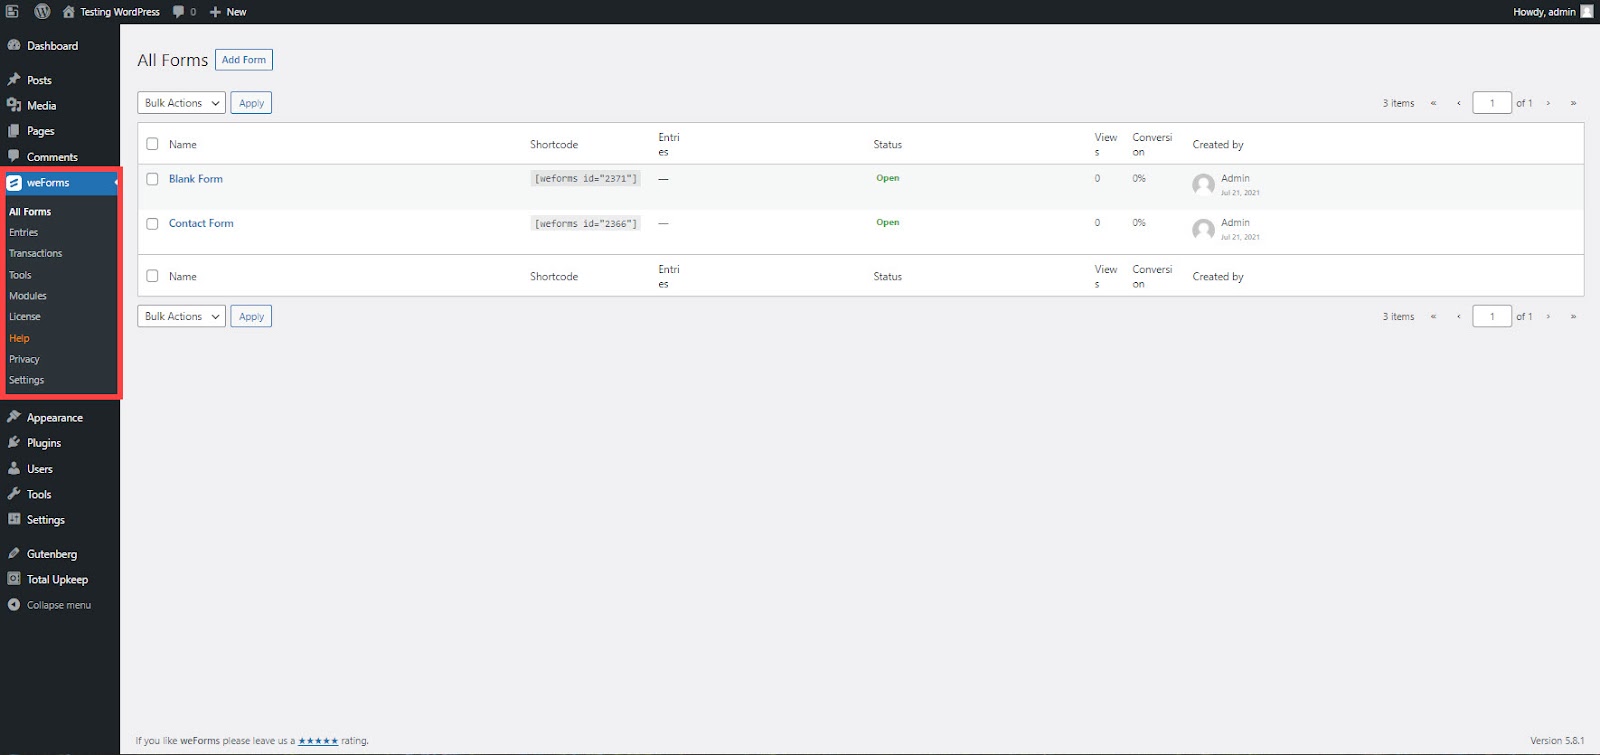
- Log into the WordPress Administrator.
- In the main menu on the left side of the screen, click on weForms.
- Click on All Forms. This view will show you all of the forms that are currently saved on your installation. You can also select to create a new form.
- Click on an existing form to edit it, or click on Add Form to add a new form.
Editing an Existing Form
When you’re editing an existing form, you are opening one that has been saved on your installation.

You can click on a field and a toolbar will appear. The toolbar has the option to move a field, edit field properties, or delete a field.
Adding a New Form
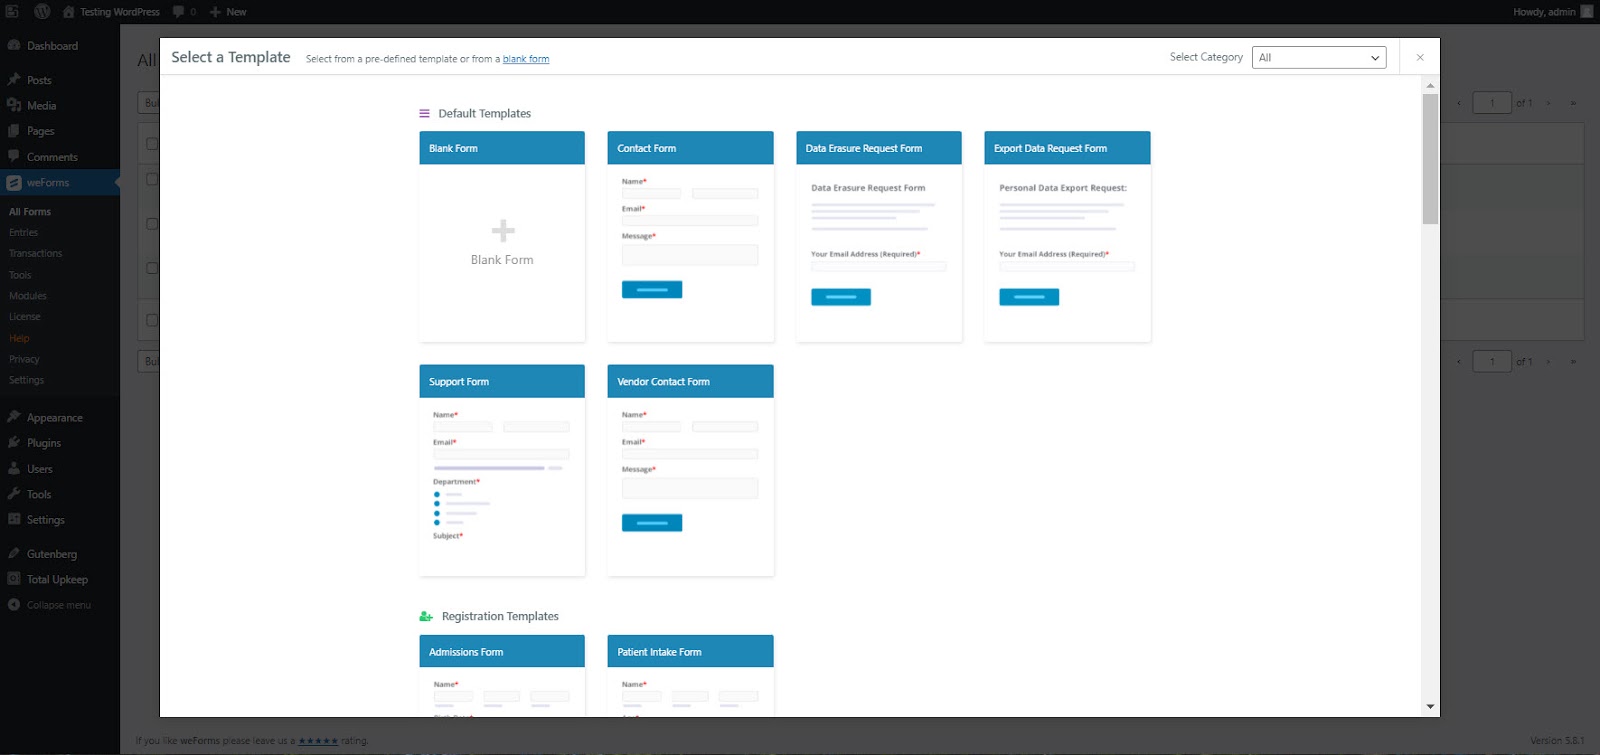
If you have clicked on Add Form then you will be creating/adding a new form using weForms. When you create a new form you start with the Select a Template page. The options for templates will vary based on the version that you have loaded – free or pro. There is also an option for a blank form that is available in both free and pro versions. Once you have selected a template, then you have added a form that can be saved.
Adding Fields Using the Sidebar
When you are creating or editing a form you can easily add fields to your form using the sidebar. Fields can be added to the form by simply clicking on a field in the sidebar or by dragging it into the form from the sidebar. Fields clicked on the sidebar will appear beneath the existing fields of the form.
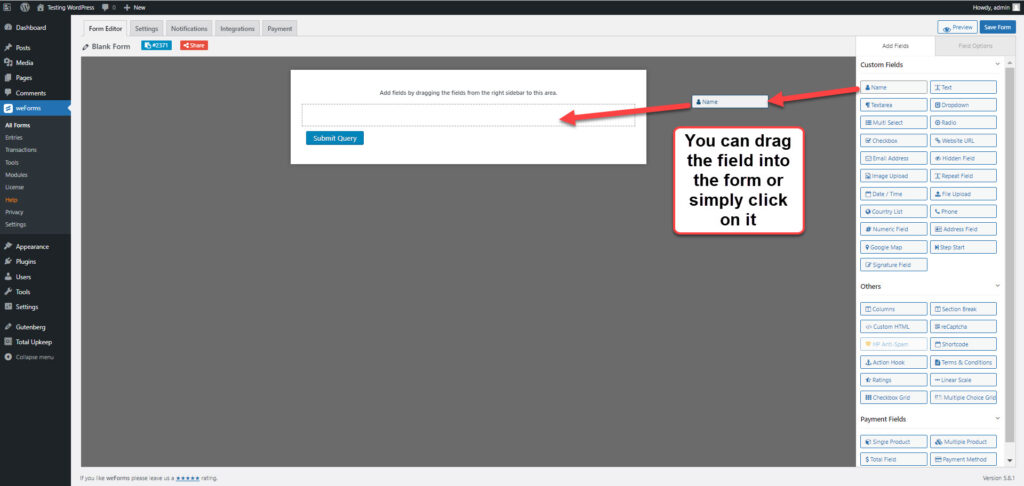
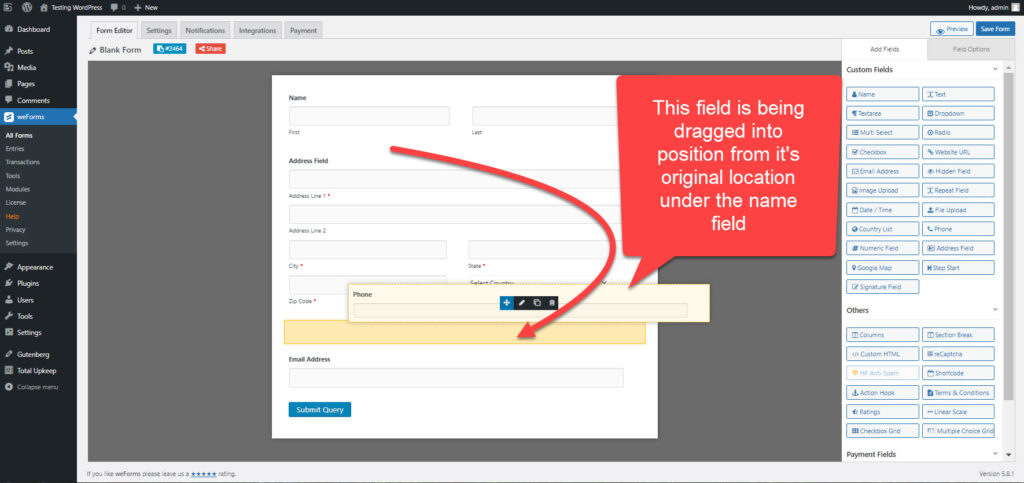
Once a field is on the form, you can select it and change its position by dragging it up or down in the form. You can also use the toolbar to delete the field if needed.
Remember to click on the blue SAVE button in the top right corner if you want to save the changes you have made to your form.
Editing the Field Options in the Sidebar
Each field that you add to the form has properties that can be edited. Follow the steps below to edit a field:
- Create a new form or edit an existing one.
- Hover over the field that you wish to edit. This will bring up the toolbar for the form. Click on the pencil icon in the toolbar to edit the Field Options. Once you click on the edit icon, the field will be highlighted. Note that field options will vary based on the field that you have selected.
- When you’re finished making changes, click on the blue SAVE button in the top right corner.
Field Options
The field options for a particular field will vary based on the field you have selected. However, all of them have properties that you can select. Each option has a description that can be made visible by simply hovering over the question mark next to the field label.
The basic options include the option to make the field required so that a user cannot skip the field when filling out the form. Click “Yes” to make a field required. A field is not required by default.

Each field will also have Advanced Options. This section gives you much more over the field. The functionality provided in the advanced section will vary depending on the field selected.
The Advanced Options will also have a CSS Class that you can use to type in a container class name for the field. This is useful if you wish to provide a unique property for the option using CSS for your site.
The Difference Between the Free Version and Pro Version Using the Sidebar

When you are working with weForms it is important to understand the limitations that you will be seeing between the free and pro versions. If you want to see a feature comparison check out this article: What’s included in weForms Professional? For more information on pricing and version options, please see the weForms Pro home page.
When you’re editing or creating a form, then options that are available in the sidebar are different. You will have far fewer options that you can select in the sidebar. Here’s a screenshot of the free versus pro versions:

Drag bar right to see the Free version sidebar options versus the Pro version
The fields not included in the sidebar of the free version include:
- Country List
- Address Field
- Step Start
- Repeat Field
- File Upload
- Numeric Field
- Google Map
- Action Hook
- Ratings
- Checkbox Grid
- Shortcode
- Terms & Conditions
- Linear Scale
- Multiple Choice Grid
While you can still create many forms using the free version, fields requiring numbers to be treated as numbers and not text will require that you upgrade. For example, if you have a field where you need to add a sum total, then it would require the Numeric Field.
This concludes our tutorial on how to use the Sidebar to create or edit a form using weForms. To learn more about using WordPress Hosting, check out our WordPress Product guide in the InMotion Hosting Support Center.