
You may find yourself needing to create the occasional order form for a product on your WordPress site without setting up an entire eCommerce system. weForms provides this easy option in a pre-built form that you can modify for your own specific needs.
weForms allows for multiple different payment methods, including PayPal and Stripe. Either of the payment processing solutions will need a valid and working account to process payments.
This guide will show you an example of how you can integrate a purchase form into a WordPress post or page. You will need to have the weForms plugin installed on your WordPress site along with your payment method properly configured in the Payment settings.
- Product Form Post/Page Scenario
- Setting Up the Form
- Creating the Form
- Configuring the Form
- Adding the Form to your Post or Page
Product Form Post/Page Scenario
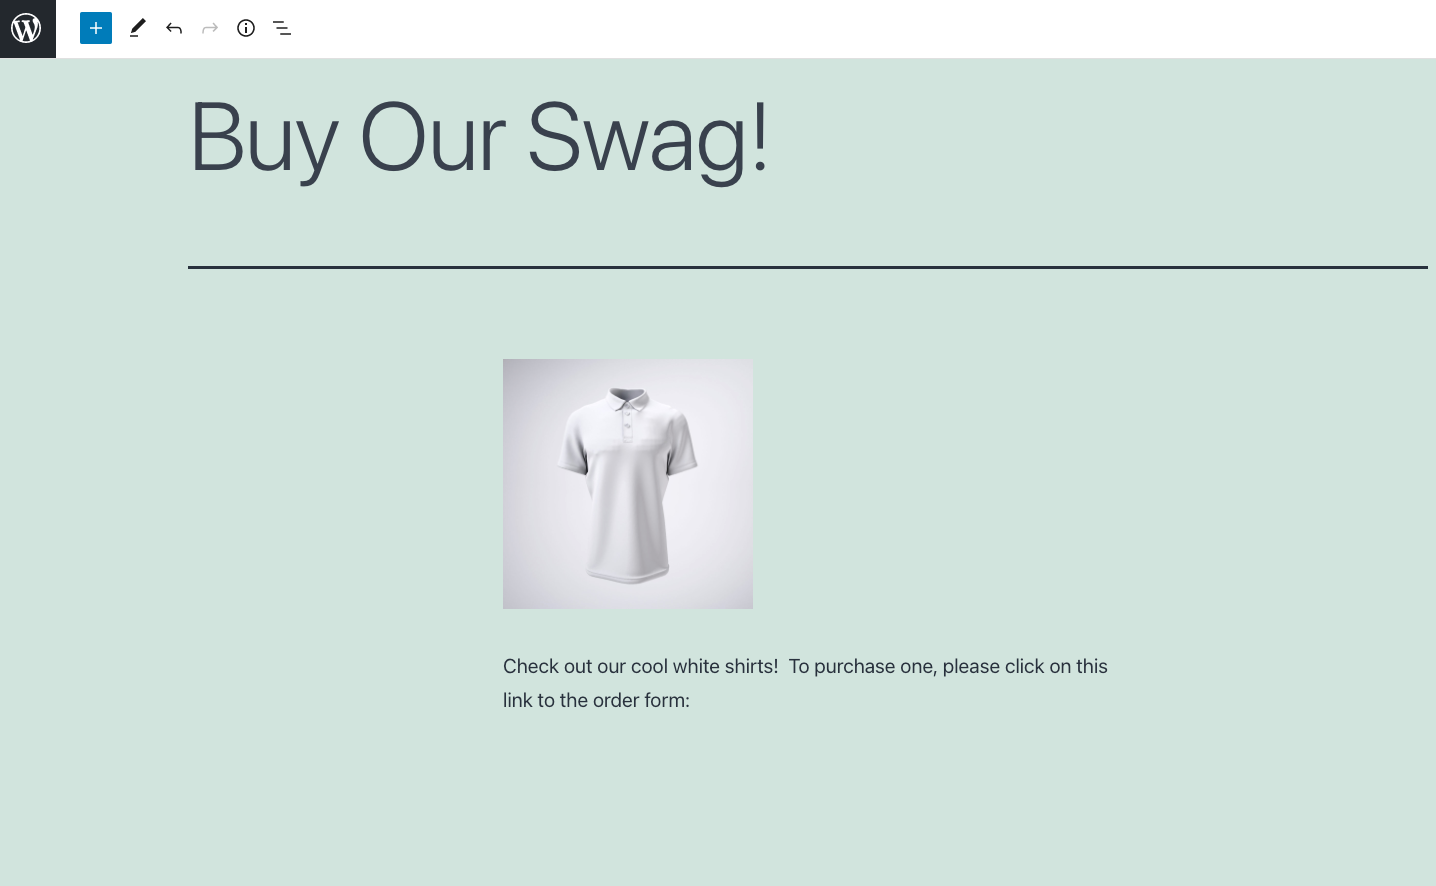
Let’s present a simple scenario. Imagine you want to make a post and sell some of your merchandise with a message, “Buy our swag!” You will want to add a link that brings the customer to a form where they can provide their information for the product details, delivery, and payment. weForms provides an easy solution for this using a product template.
To find the template you will need to follow these simple steps:
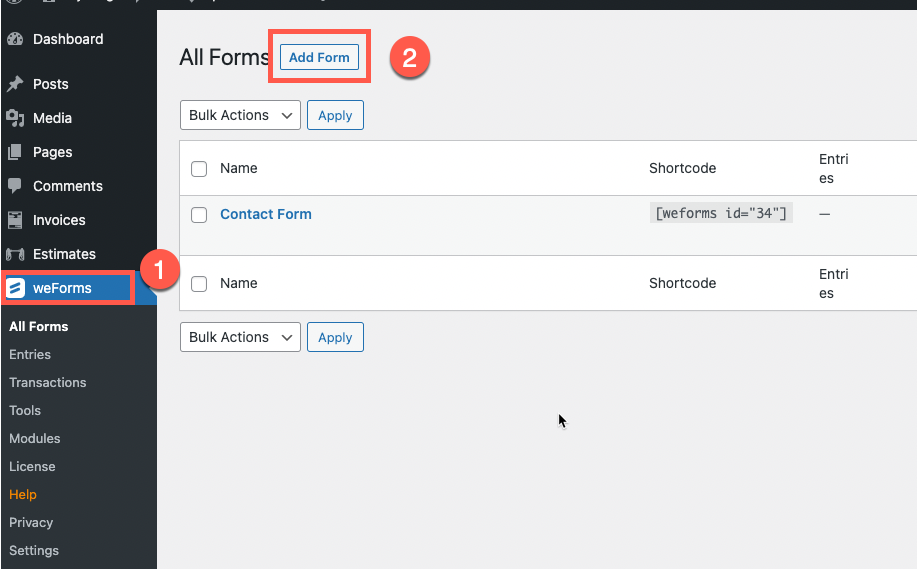
- Log in to the WordPress Administrator.
- Click on the weForms menu.
- Click on All Form.
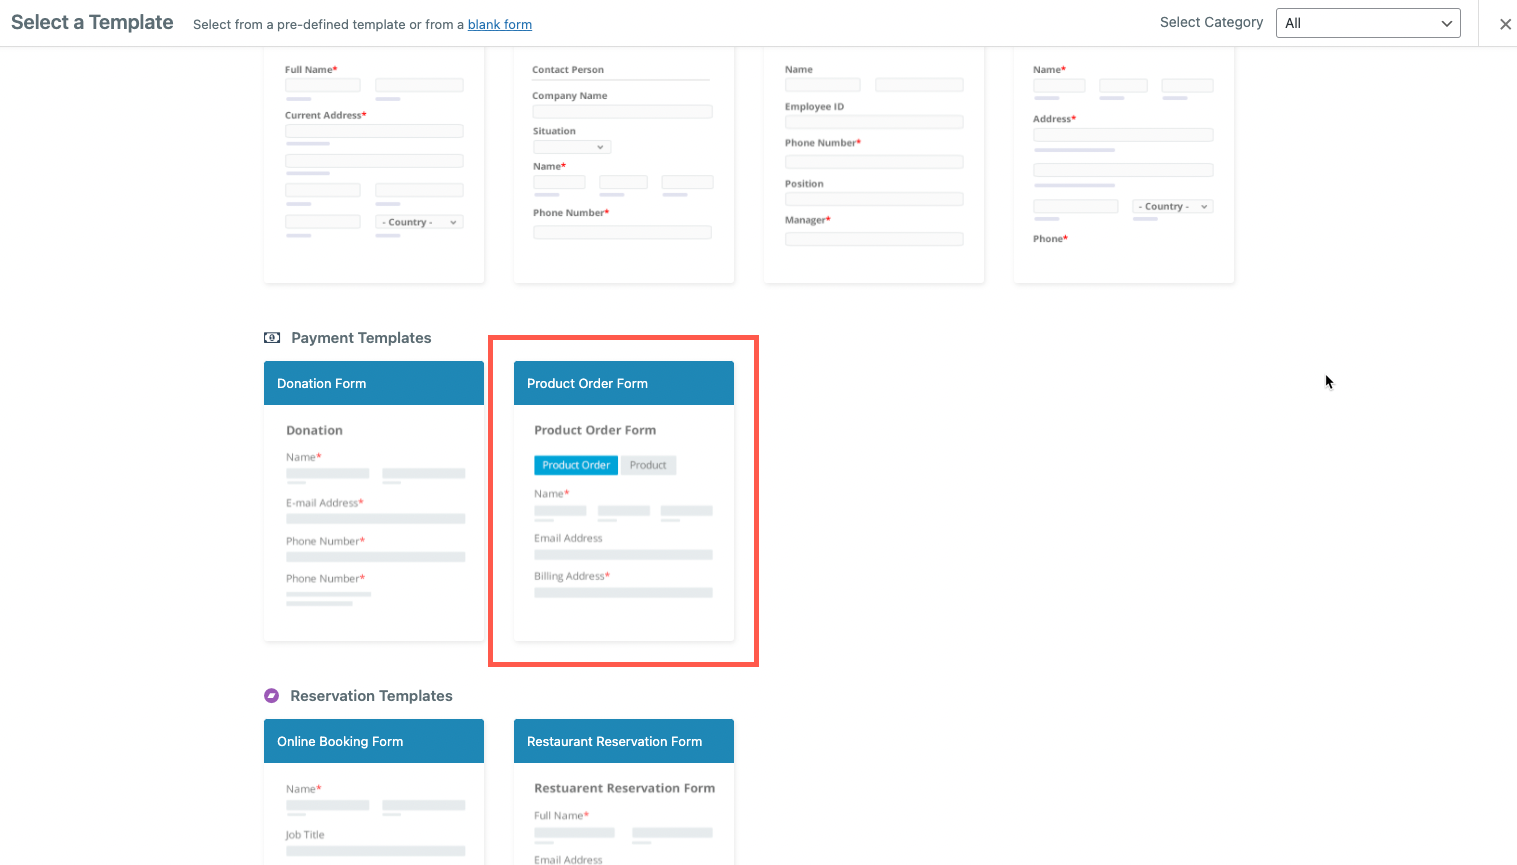
- You will see a list pre-built form templates. Scroll down until you find the Product Order Form. Click on it to select that form.
Setting Up the Form
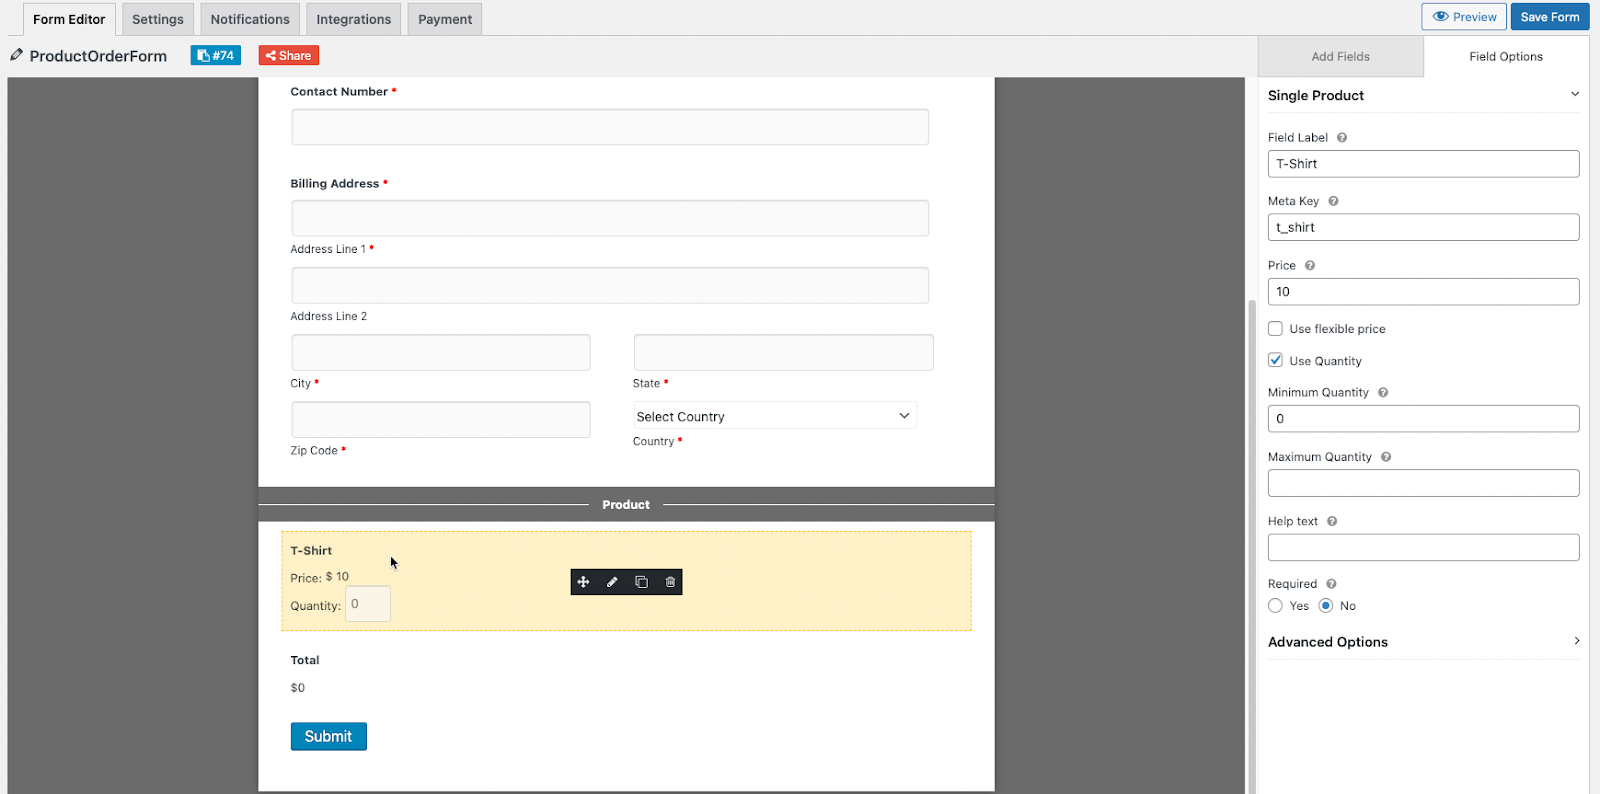
You will then be placed in the form editor for weForms. This section allows you to quickly make changes to the form and configure it for purchase information, notifications, integrations, and payments.
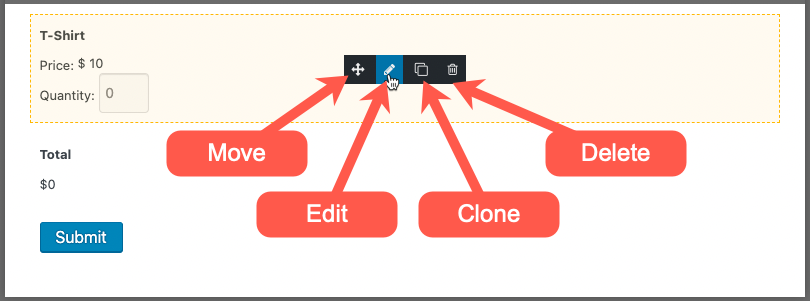
weForms is very easy to use when editing forms. Each section in the form can be moved using the move icon and dragging and then dropping it into the desired position.
The pencil icon allows you to edit each element in the form section. You will see the option to make changes on the right column when you click on this icon.
You can also clone a section very quickly by clicking the clone option. If you do this accidentally or decide you don’t want a section you can easily delete using the trash icon.
weForms allows you to add a number of types of fields by simply dragging the option onto the form from the right column.
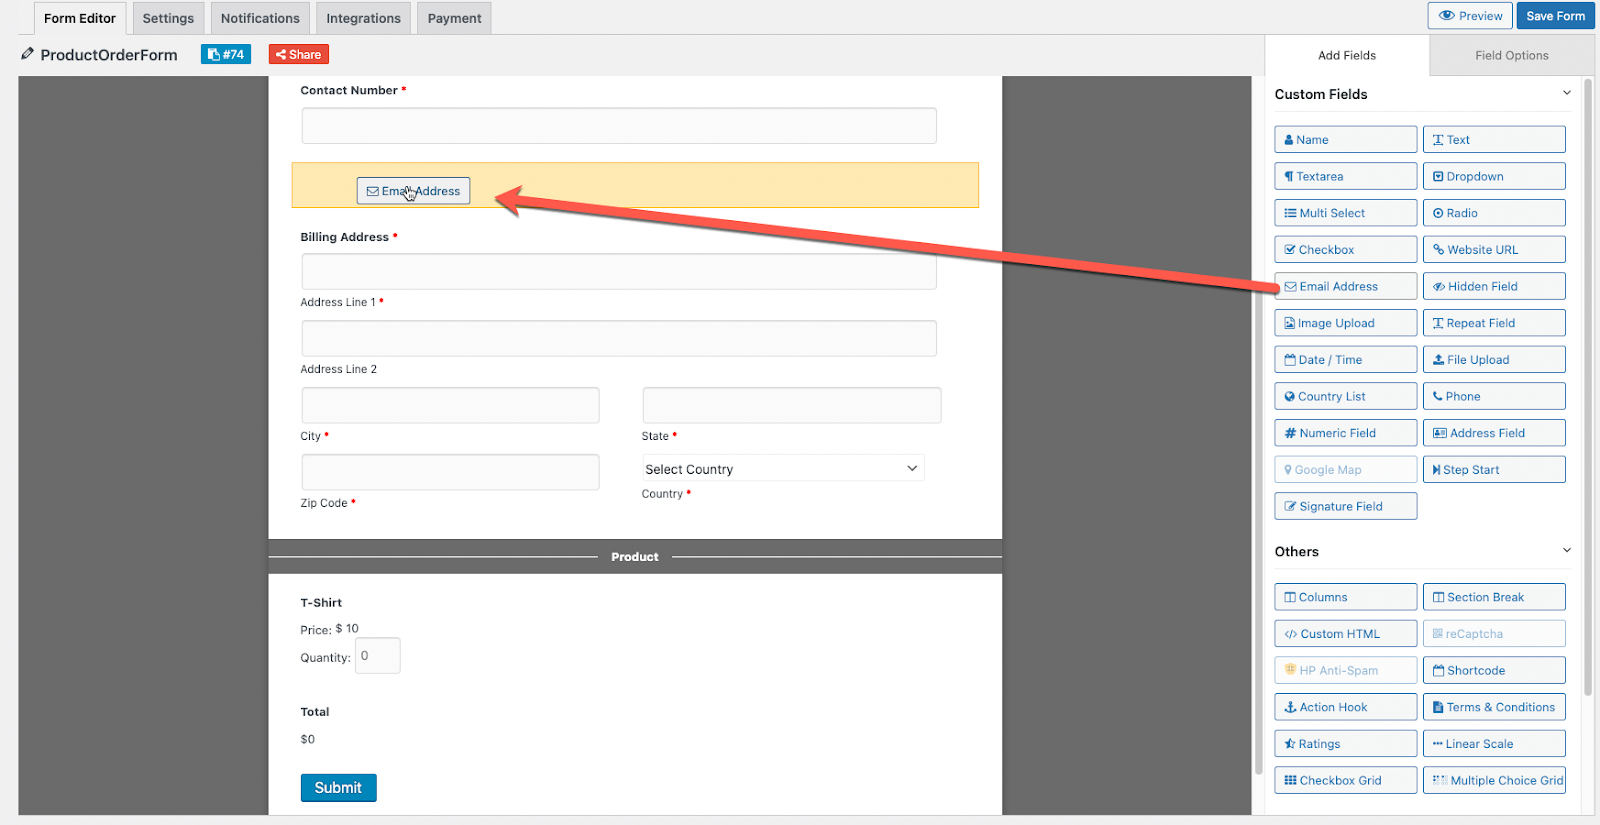
Once you’re satisfied with all of the fields on your form, click on the blue Save Form button in the top right corner.
Next you will need to configure the form Settings, Notifications, Integrations, and Payment options.
Settings
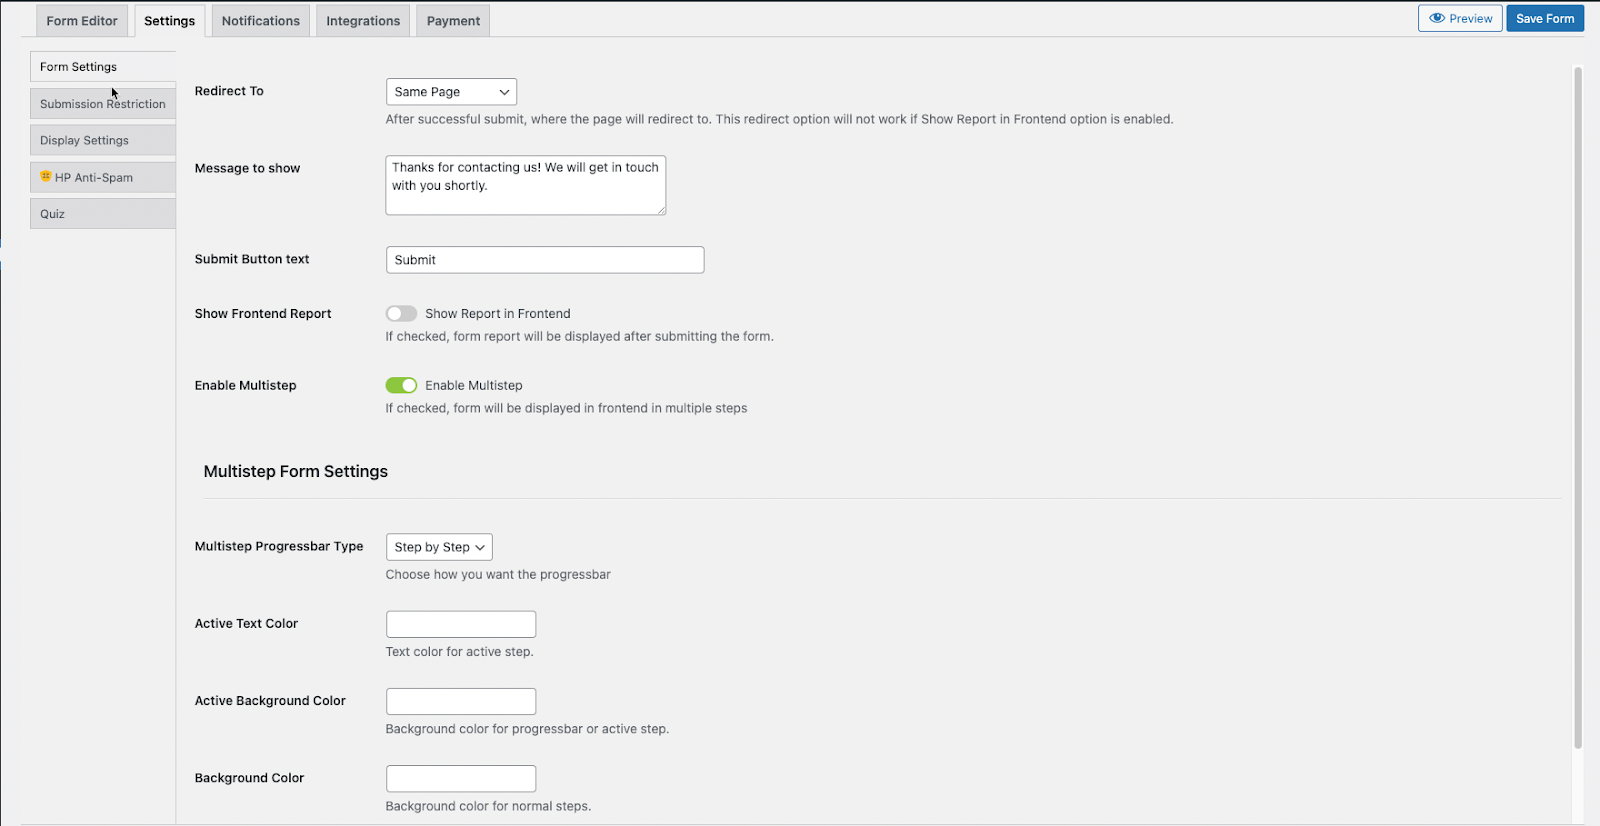
The settings tab allows you to set up the actions taken after the form is submitted. This section is divided into two main parts, Single Step form and Multistep form settings. The latter is the only one that appears titled in the settings.
To understand the difference, a single step form functions so that the user can add ALL of their information at one time and then hit submit. A multistep form may divide the form input into steps for your personal information, address, shipping address, and payment information.
If your form is simple and you’re not requiring a lot of information, then you do not need to enable the multistep option. The following table is a list of all the options in the Settings tab:
| Redirect To | You can redirect to a specific page, custom URL, or stay on the same page after a successful form submission |
| Message to show | Message displayed on form submission |
| Submit Button text | Button label on the form to submit it |
| Show Frontend Report | Form report displayed after submitting the form |
| Enable Multistep | Displays the form in multiple steps if enabled |
| Multistep Progressbar Type | Displays each step or uses a progressbar |
| Active Text Color | Color used for the text in an active step |
| Active Background Color | Color used for the progressbar or active step |
| Background Color | Color used in the background for normal steps |
| Conditional Logic on Submit Button | Conditional logic used when enabled (e.g. if form is incomplete or the data doesn’t match, it will not submit) |
Notifications

Here you can set up notifications that will be emailed to specific individuals. By default, there is an Admin notification. You can easily add and edit other notifications and address them to specific people who may need to know about the order in order to properly note it or fulfill it.
Integrations
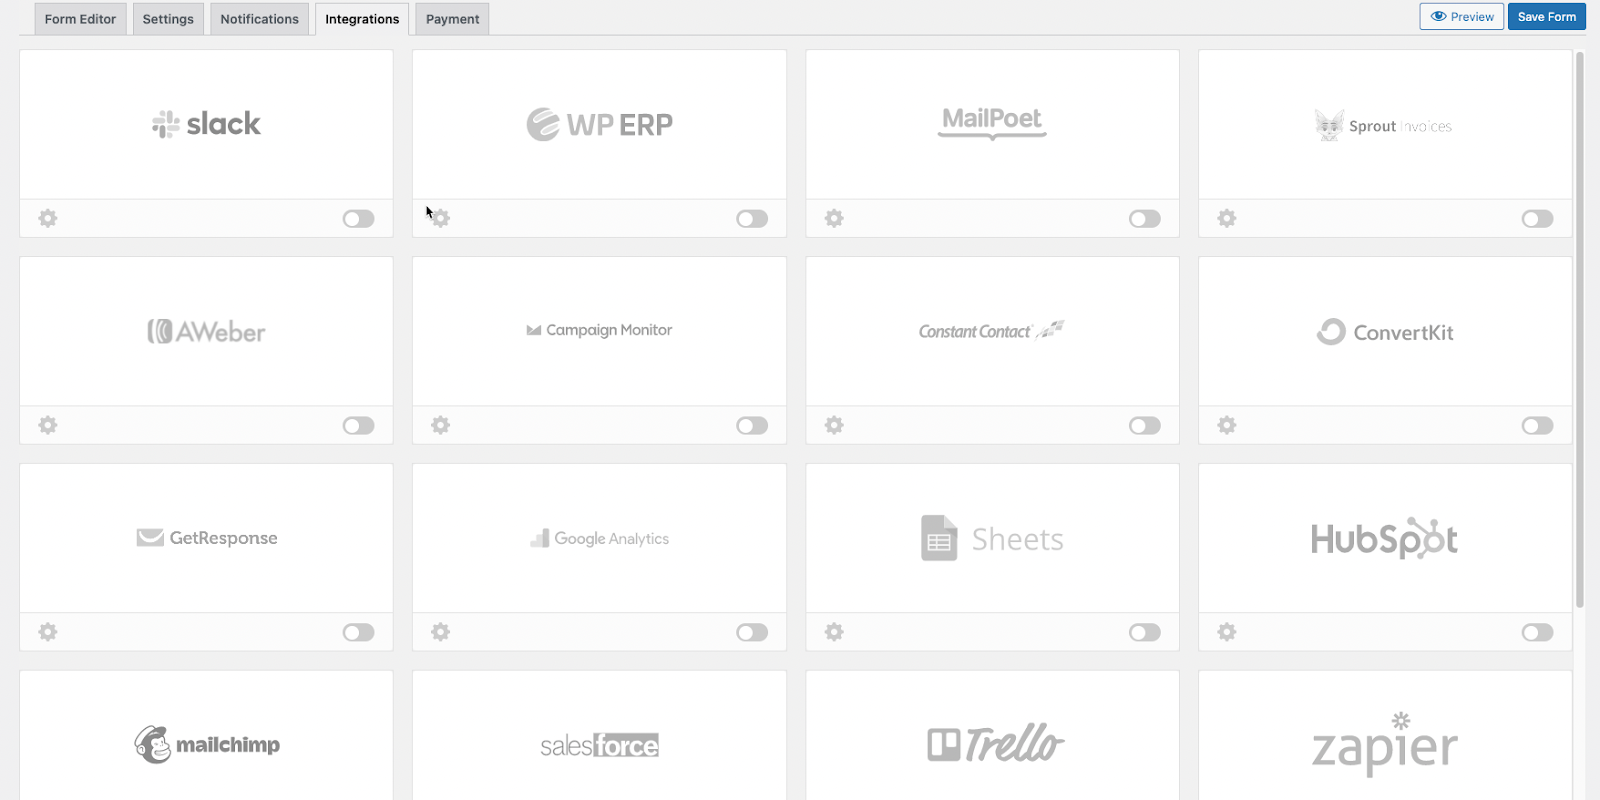
weForms is a powerful forms option for your WordPress site and allows you to integrate many third party solutions into your forms. For example, if you wanted to link MailChimp – an email marketing solution, then you can integrate with this form and have marketing emails sent upon the successful submission of your form. Note that the use of these integrations may require more than the base installation of the weForms plugin.
Payment
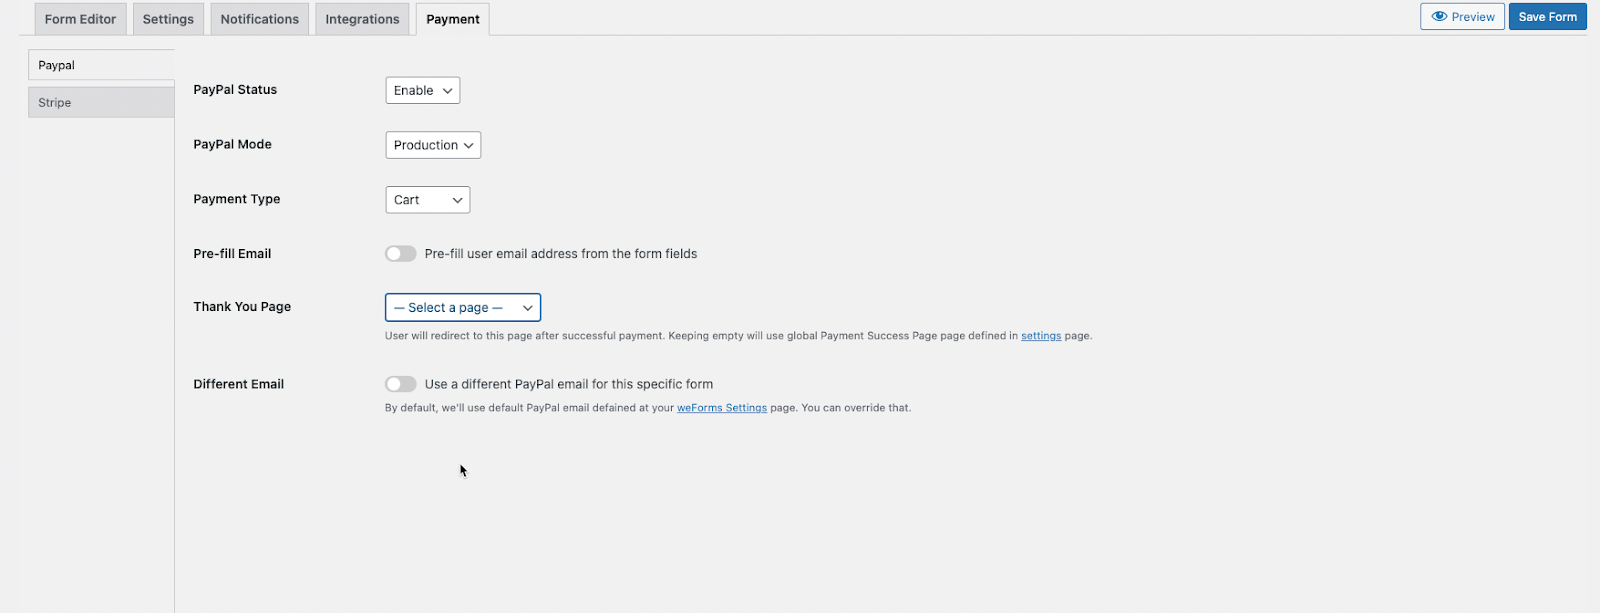
The final tab that you need to configure for your product-selling form is the Payment tab. Here you can select either Paypal or Stripe as your payment transaction processor. The Payment tab is only for enabling the option, setting it up for production or testing (sandbox), and selecting a “Thank You” response page once the transaction is successfully completed.
The specific account credentials would need to be properly configured in the Settings tab for the weForms plugin.
Note that the Paypal option also allows you to designate a DIFFERENT email address in order to process the payment using a different Paypal account than the one configured for your WordPress site. This is useful for when you want to direct payments to a different individual or organization.
Adding the Form to your Post or Page
Once you have your form properly configured, your last step is adding it to the post or page in your WordPress site. Each form created by weForms is identified with a shortcode. Using the default WordPress editor, it’s simply a matter of adding a shortcode block and then pasting in the shortcode for the form.
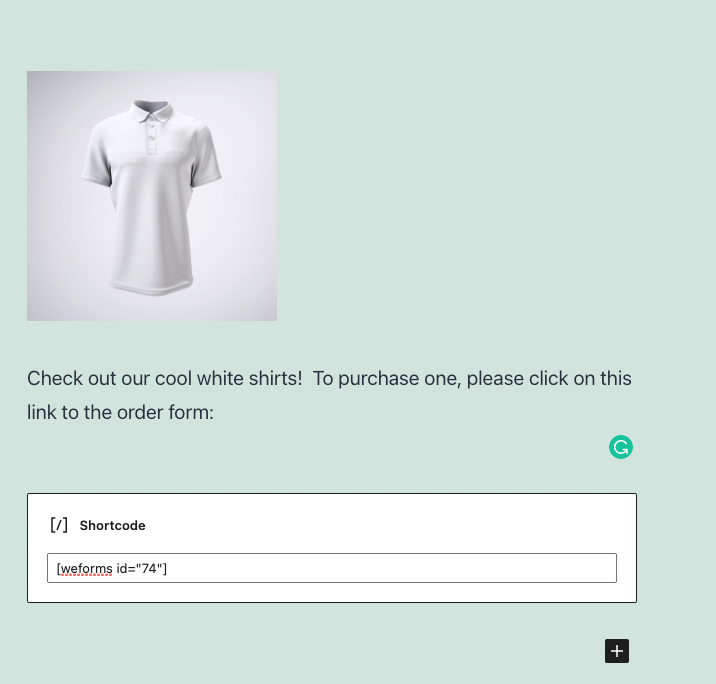
Save your page or post, and you’re finished!
Congratulations! You now know how to set up and configure weForms to sell a product on your WordPress site. To learn more about weForms and how it best works check out our other articles and guides on our website.