There may often be a need to make forms available to the visitors of your WordPress site. One way to provide forms is to simply make them selectable from a menu. weForms is a flexible and powerful forms plugin that you can use to create forms that can then be easily added to your WordPress menu.
Follow the steps below to learn how you can take a weForms form and make it a part of your WordPress menu.
- Create the Form(s)
- Create a Post or Page for Each Form
- Add the Forms to your Menu
Looking for a new home for your WordPress site? Check out InMotion’s WordPress Hosting solutions for a secure and performance-oriented server tailored to your business needs.
Create the Form(s)
Before you can add a form to your WordPress menu, you will need to create it. weForms makes it easy to create a form. The steps below are a quick summary of how to create a new form using the weForms plugin.
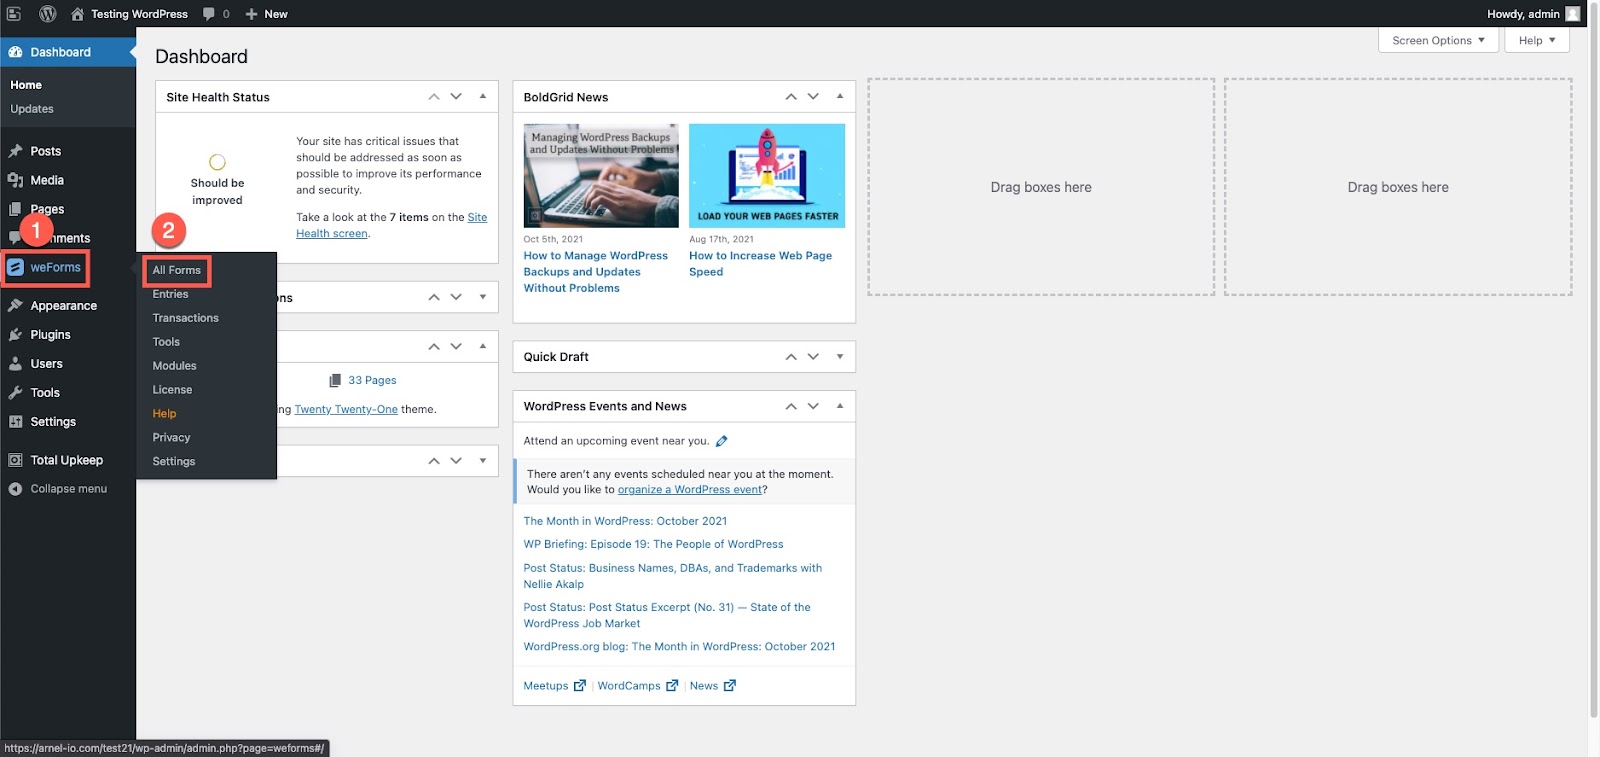
- Log into the WordPress Administrator Dashboard.
- Click on weForms in the menu, then select All Forms.
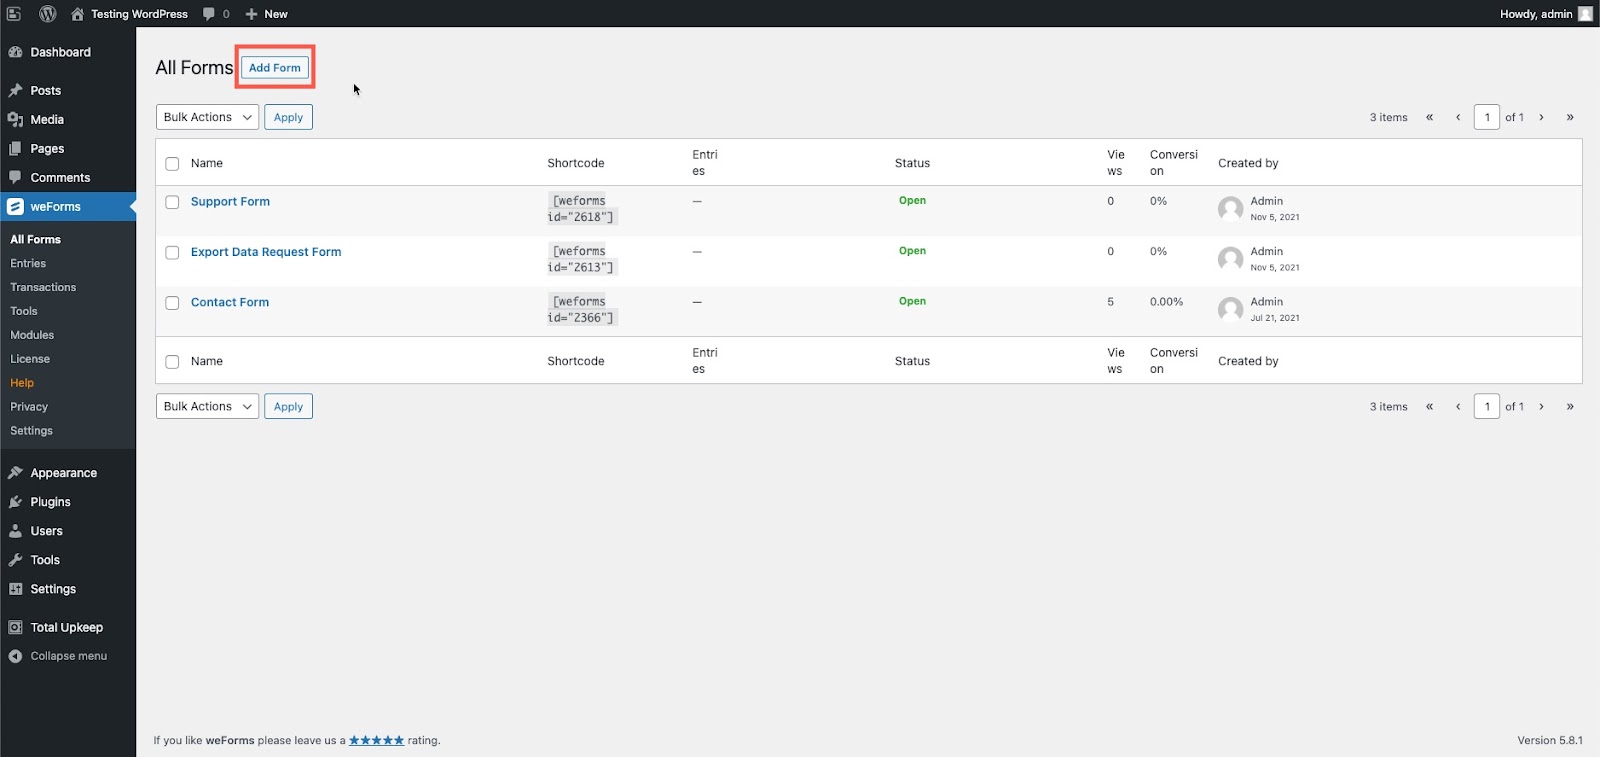
- You will then see a list of any existing forms. At the top of the page, click on the Add Form button to create a new form.
You will have the option to select a form from an existing template or use the blank form to create your own form. The choice in templates will depend on the version of weForms that you have loaded.
To see a more complete tutorial on creating a form, please see How to Add a Form to your WordPress Site using weForms.
Create a Post or Page for Each Form
After you have created your form, you will need to add each form to a post or page that can then be used for your WordPress menu. The WordPress Visual editor (also known as Gutenberg) makes it easy to add weForms to a post or page without having to use shortcode.
For this tutorial, we will use pages for each form that has been created.
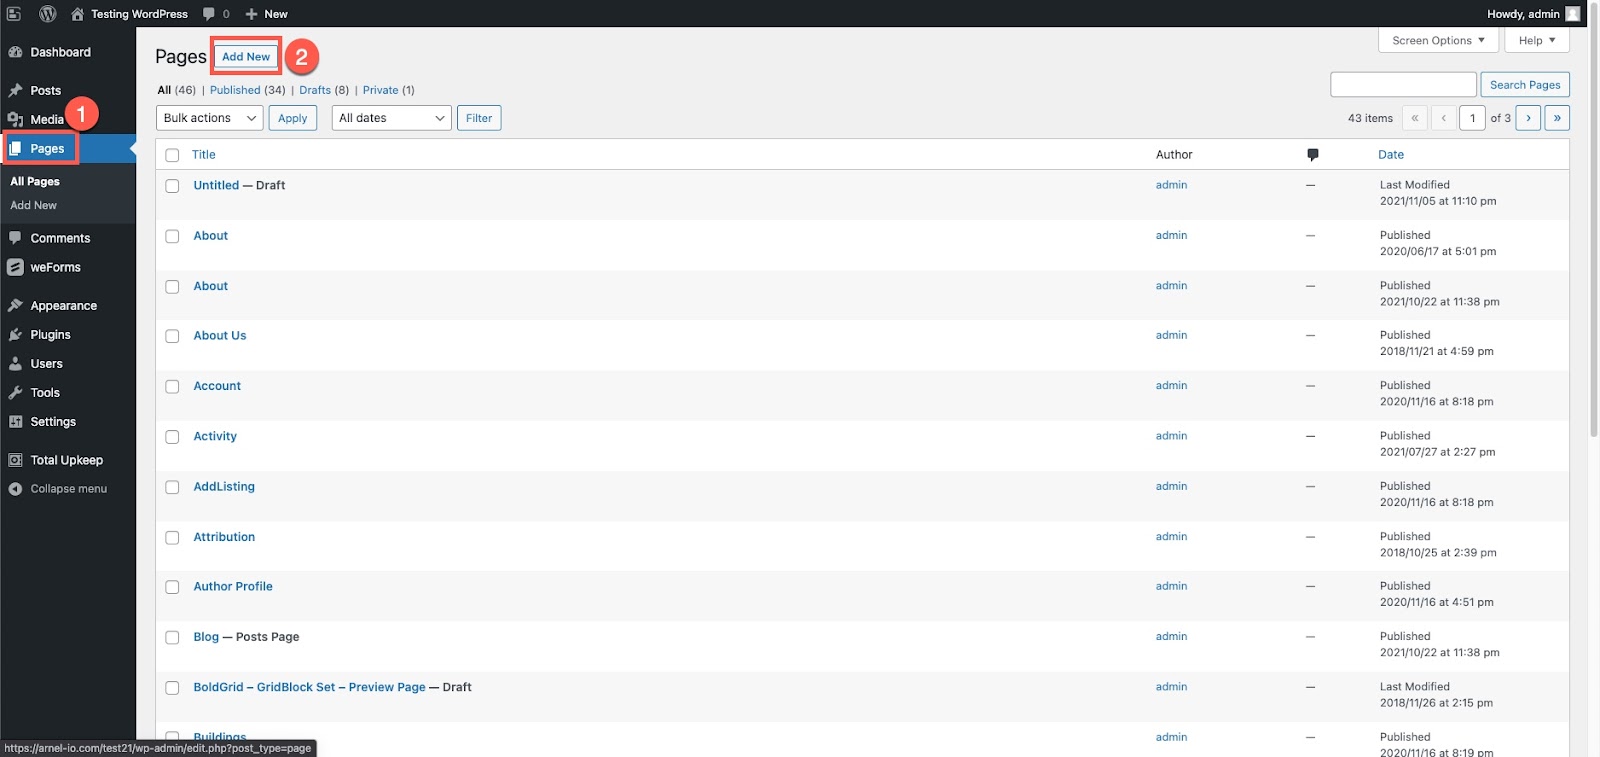
- Log into the WordPress Administrator Dashboard.
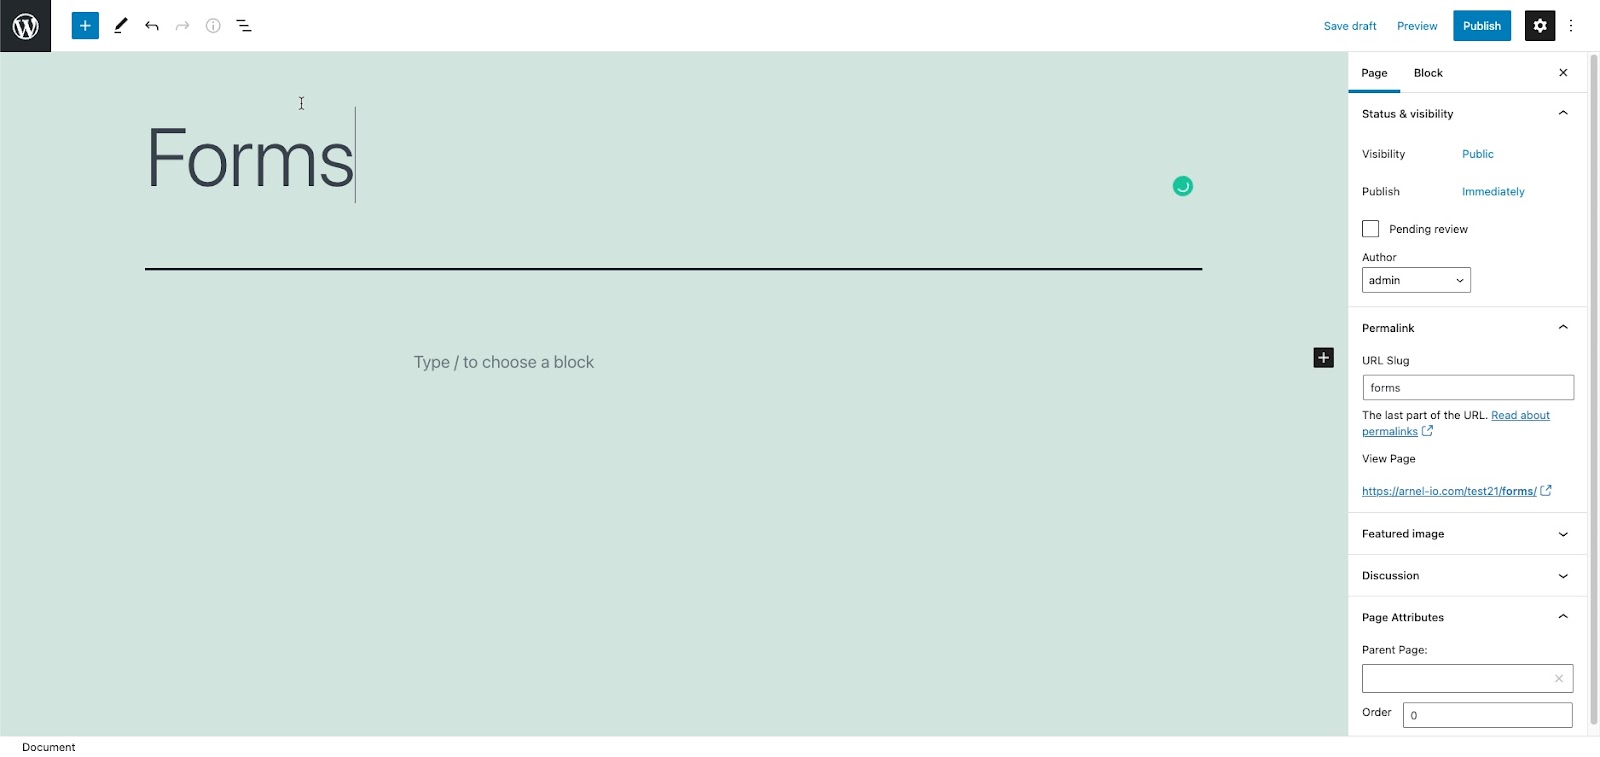
- Select Pages from the menu, then click on Add New.
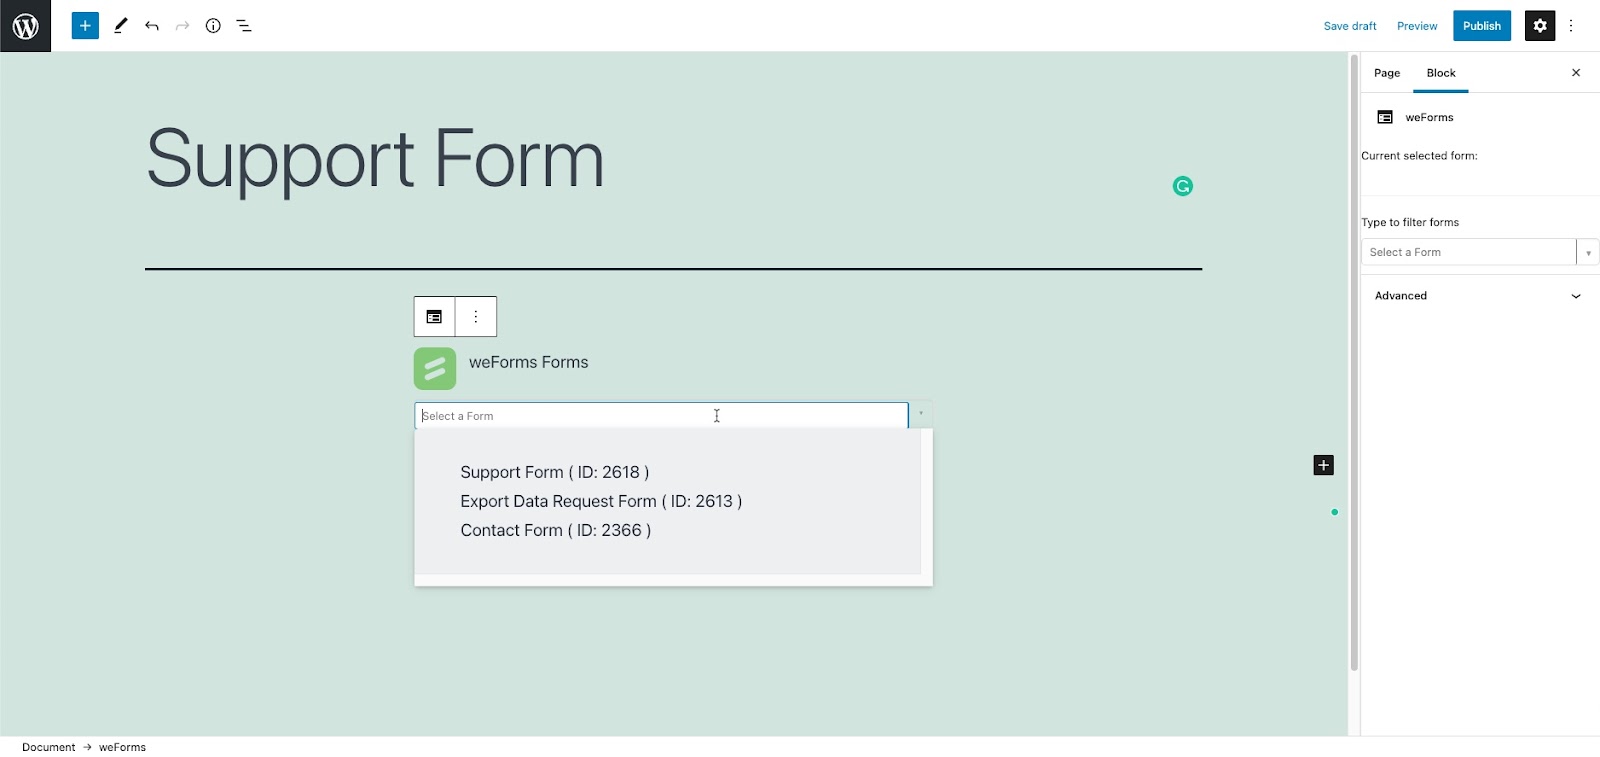
- After you have created a new page make sure to title it corresponding to the form that you want on that page.
- Next, click on the + sign to add a new block. You can search for the block by typing “weForms”. As you type it, you will see the block appear.

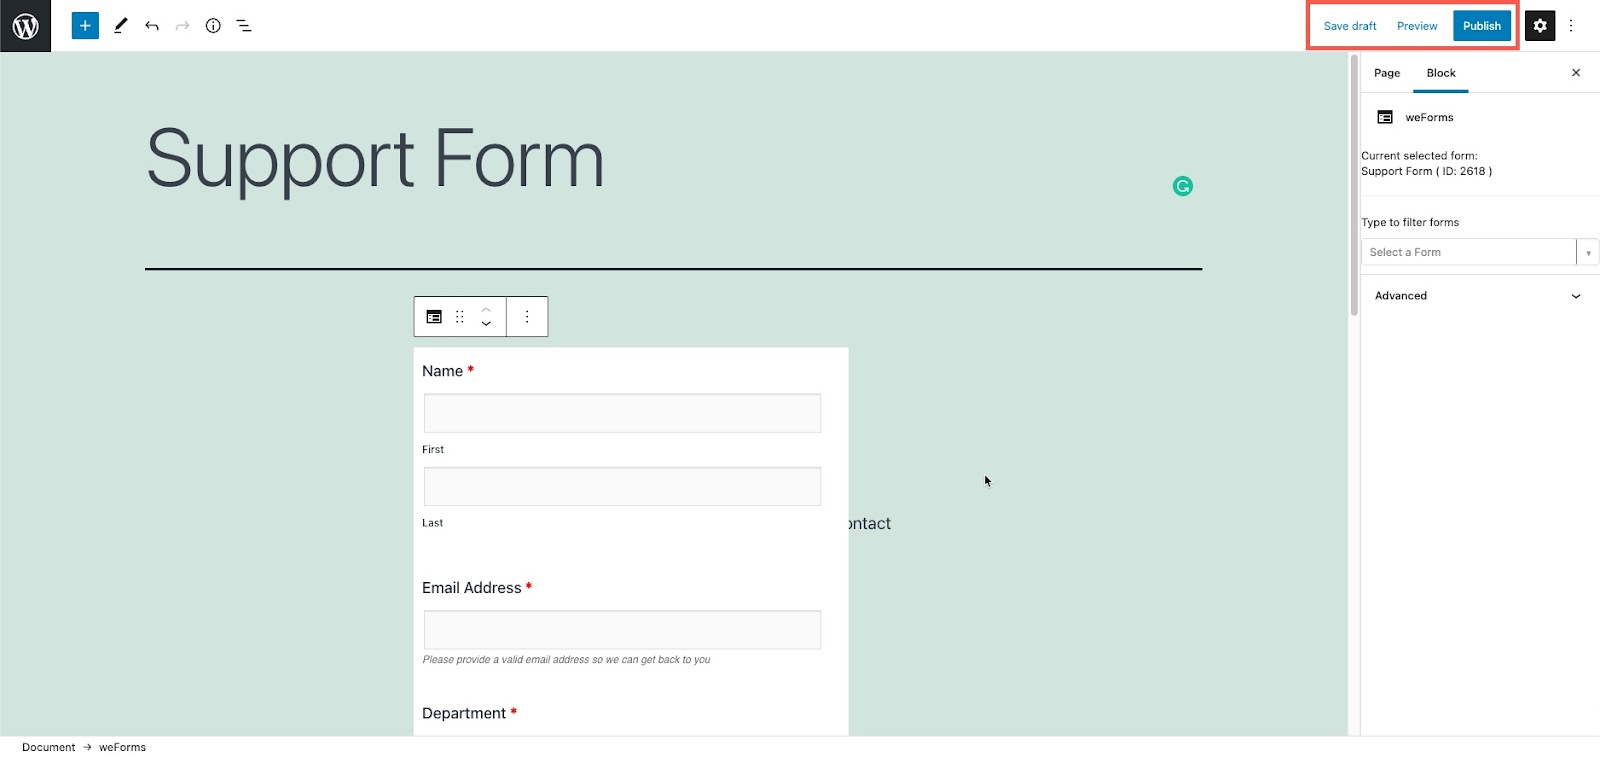
- Click on the block to add it to your page. You will see the block on the page and there will be a drop-down arrow that you can click on to select existing forms.
- Select the form that you want to use on the page. Make sure it corresponds to the title of the page.
- Click on Save Draft or Publish in the top right corner in order to save the page. Remember that the page would need to be published in order to use it for your menu.
Repeat these steps for each form that you want to add to your menu.
Adding the Menu Header
You will also need to create a page or menu header that will contain all of your forms. This will be the menu item under which your form options (as menu selections) will exist.
If you create a page labeled Forms, then you can also add each form on that page. However, it’s not required. The main issue will be that clicking on that form will result in the Forms page appearing. Providing links to each form, or text explaining the form page will be something to add.
You can also use the Custom Link option to create a menu header. If you make the link point to the home page, then clicking on the menu will result in the home page re-loading.

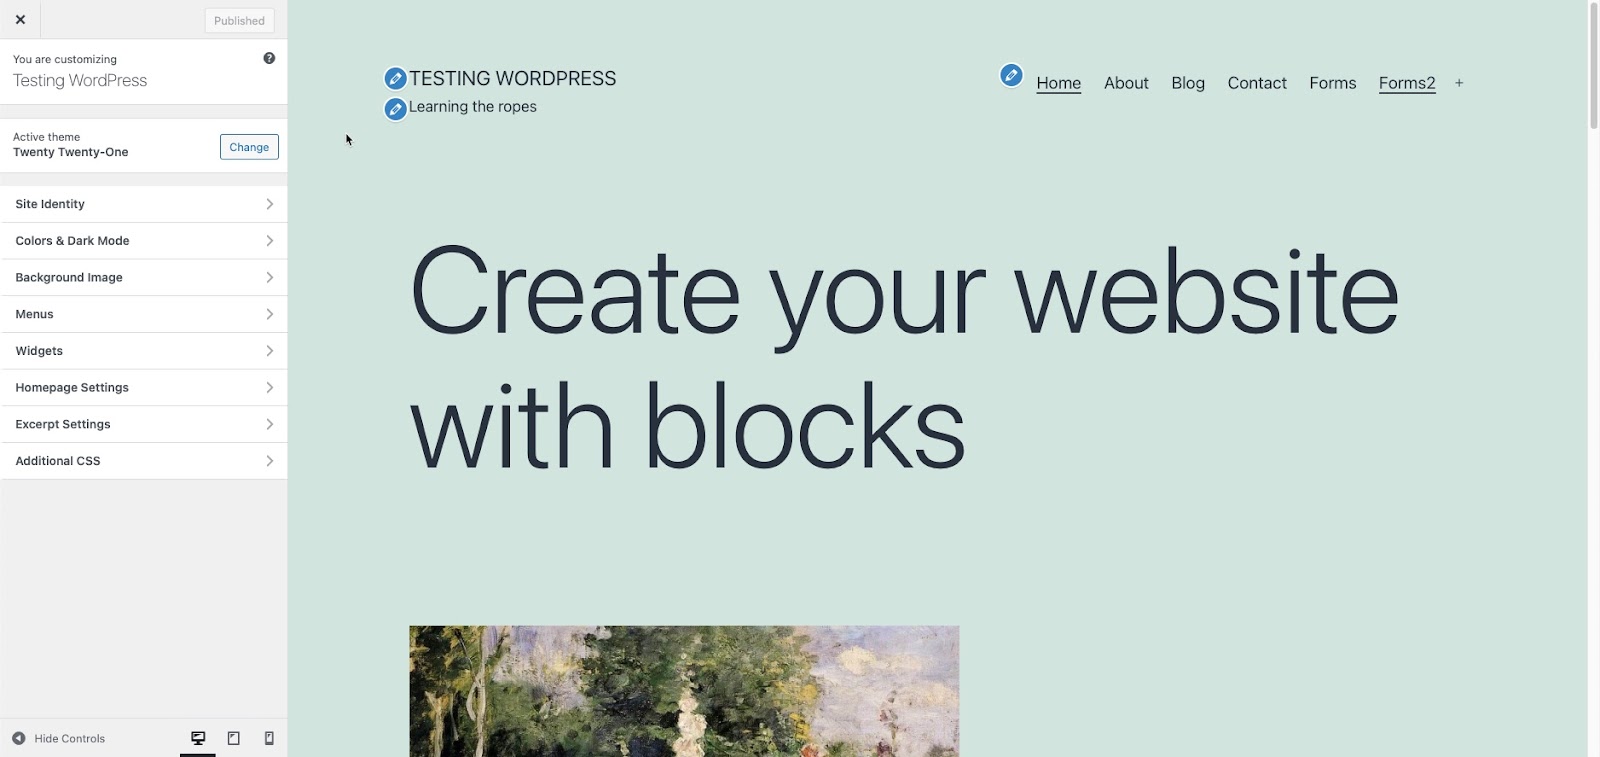
The screenshot above shows the forms as menu selections under the Form2 menu header.
Add Forms to your Menu
Now that you have your forms matched to a page or post, the next thing is to simply add them to your WordPress menu. There 2 main ways to add items to your menu – through the Administrator Dashboard or through the Customizer on the front end.
- Log into the WordPress Administrator Dashboard.
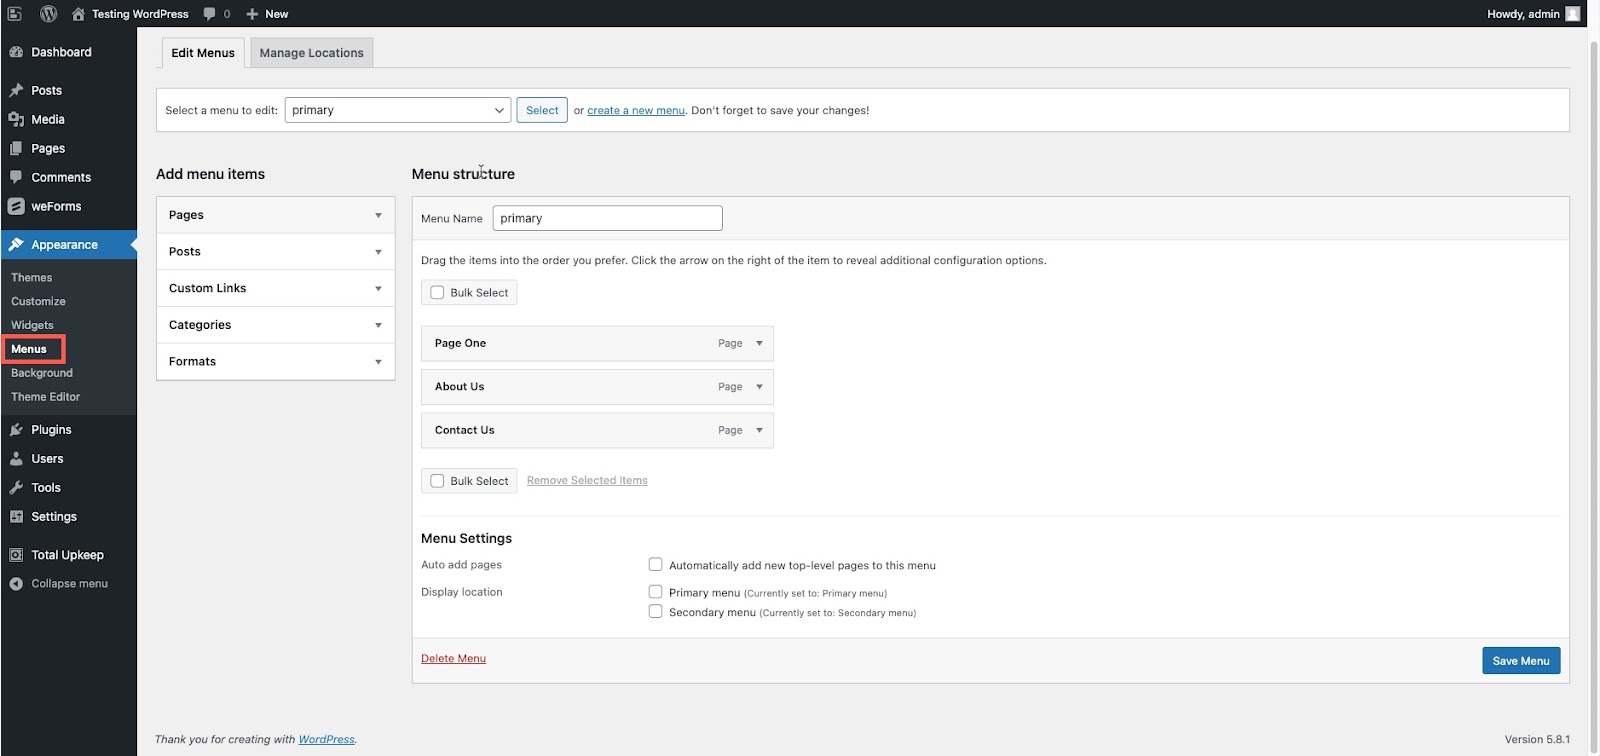
- Click on Appearance, then select Menu. If needed you can expand either the Pages or Custom Link section to add the menu header.
- Select the menu header that you created earlier.
- Add your form pages under the menu header that you have selected. Each menu item can be dragged and dropped into place under the menu. You can also position the order of the menu items this way.
- Click on Save Menu.
You can also add to a menu using the Customization option in WordPress.
- Log into the WordPress Administrator Dashboard.
- Click on Appearance, then select Customize.
- This will bring you to the Customization page showing the front end of your WordPress site. Click on Menus.
- To create your menu header, click on Custom Link or Page in order to add them.
- Click on Pages to add your weForms Form pages to the menu.
- Click on Publish in the top left corner in order to publish and save the changes you have made to your menu.
For a complete tutorial on adding menus in WordPress, please see Creating Custom WordPress Menus.