
When capturing leads on your website with contact forms, you might need to also gather the address of your users and customers. You may want to send something to them later, or use it just for gathering customer data. In a case like this, weForms has you covered. Our WordPress contact form plugin has a pre-built custom Address Field which can be easily tailored to your needs. From street address to city or zip code, every detail can be collected by you to fit your needs.
The following article will outline how that can be leveraged for your marketing needs and walk you through using the weForms drag and drop contact form builder to achieve exactly what you need for lead capture, the first time.
Address Field

The Address field type lets you easily insert an address collection section in your form where site visitors can input their Address. It is divided into six sections by default:
- Address Line 1
- Address Line 2
- City
- State
- Zip Code
- Country
To add the address field type to your form, you need to click on the Address Field from Custom Fields section or simply drag and drop it on the builder.
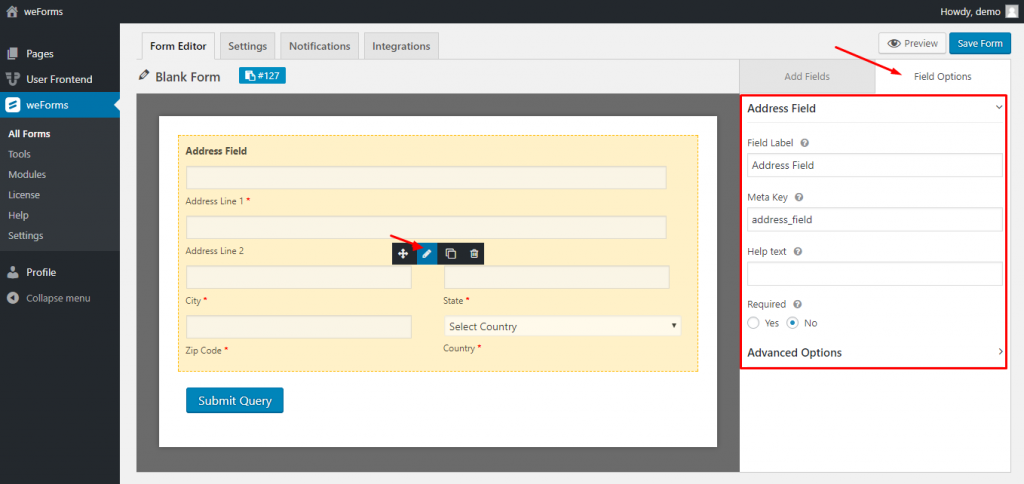
Address Field Options
The Address Field has multiple Field Options, such as:
- Field Label: This gives you the option to change the name of the field. You can set it to what you want
- Meta Key: A meta key will be auto-generated but you have the option to change it.
- Help Text: This will show text in the field to make the user more aware of what information to give.
- Required: This gives you the option to make the field required or not for submission
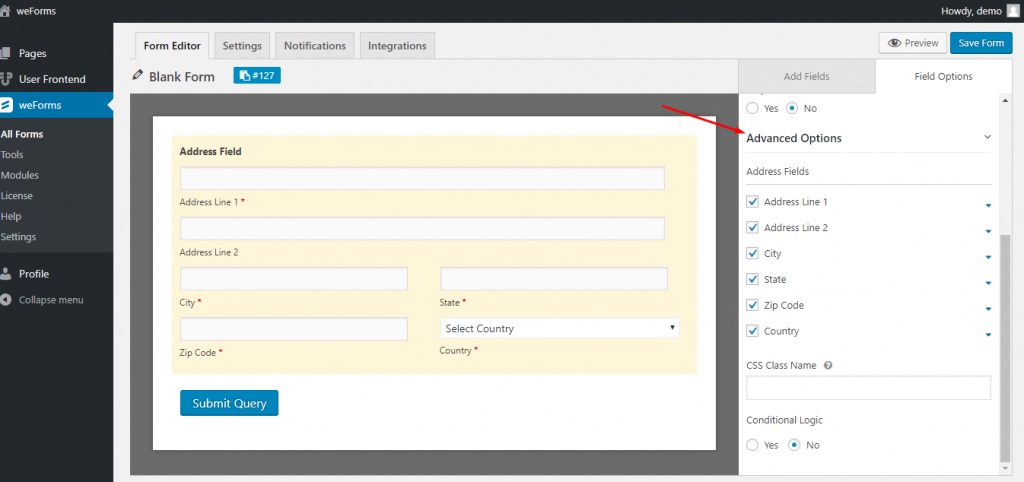
Advanced Address Field Options
Advanced options can be expanded by clicking on the section labeled Field Options in the right sidebar. This will show you all the options available to you for customization of your contact form. There you will see
- Address Fields: You can check what field you want to show to the user. Unchecking will remove that field.
- CSS Class Name: It helps you to include CSS class to the field. If you want to add your custom made design to the contact form you can do it from here.
- Conditional Logic: You can add Conditional Logic to your contact form to adapt to information. This function is available only in the paid version of weForms, so upgrade now to get that functionality added if you are on free.
Frontend view
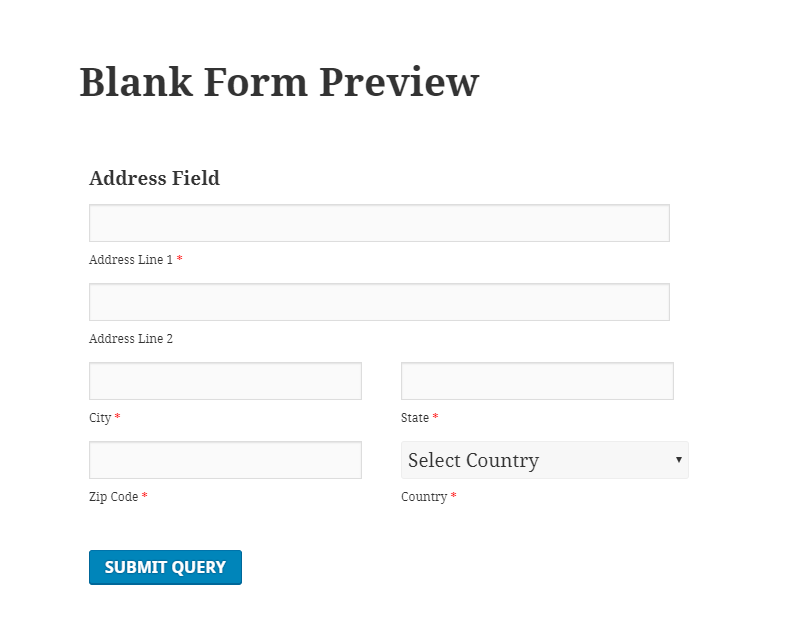
After updating or publishing a page containing a form with the Address field, your contact form should appear with it now.
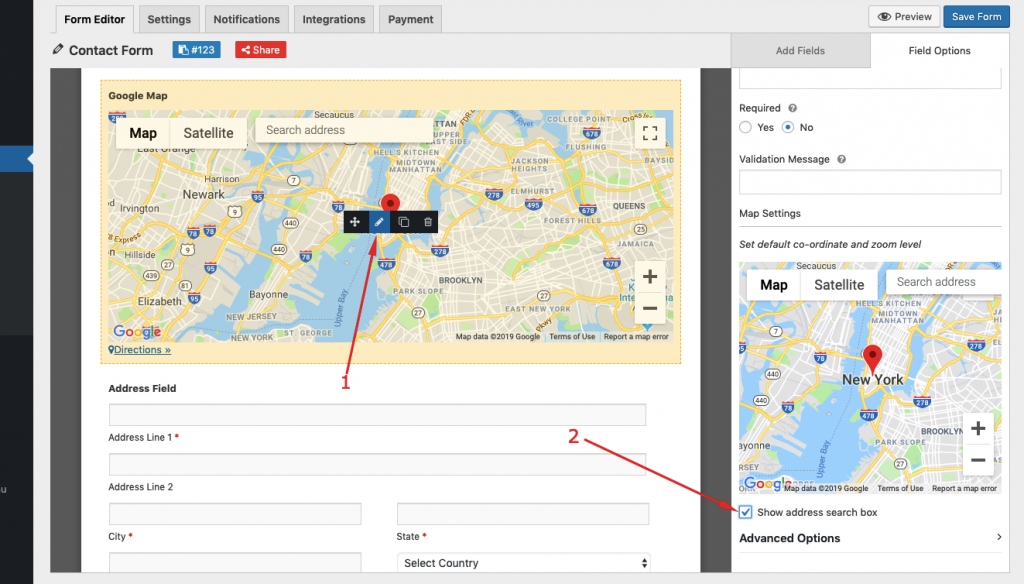
How to Autofill the Address Field Using the Google Map field?
If you are using weForms Pro, the Address Field will be auto-filled from the Google Map field.
To do so, you will have to drag and drop both the Address field and Google Map field into your form builder. After that, go to the field options of the Google Map field and check the box “Show Address Search Box “.
Now, save and publish the form. Now when a user selects any location from the Google Map the location will automatically be added to the address field.
Here is how a user will autofill the address field from the frontend:
The user will search on the map and click on the location and the fields of the address field options will be filled like below:
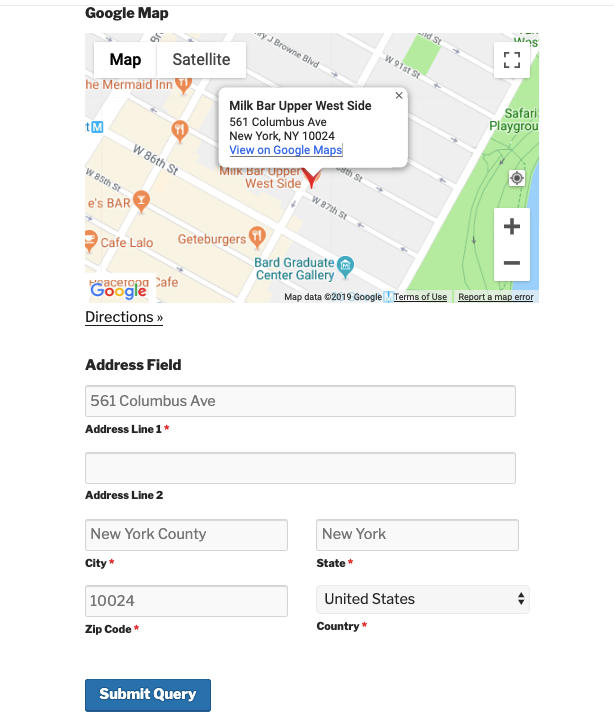
Finally, the user will hit the “Submit Query” button. Congratulations, you now know how to adjust your forms and add an address field for your visitors, and how to autofill that based on the search a user performs in the Google Maps Field.