You may need your users to upload documents or images at some point through your WordPress contact form plugin. It’s very easy to do this with weForms WordPress form file upload field from the built-in custom fields available in our premium plans.
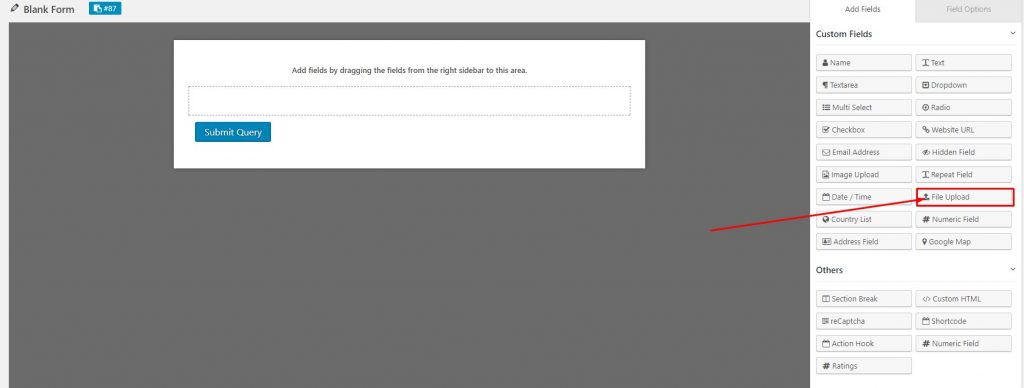
To accomplish this, first go to your WordPress Dashboard→weForms→All Forms→Add Forms→Blank Form or choose from a Template
Once this has been done, you can click or drag the File Upload button from the custom field section. Its field and options functionality can be seen in the steps below.
How to use weForms File Upload
1. Create the field by dragging or clicking on the File Upload option from the built-in custom fields.

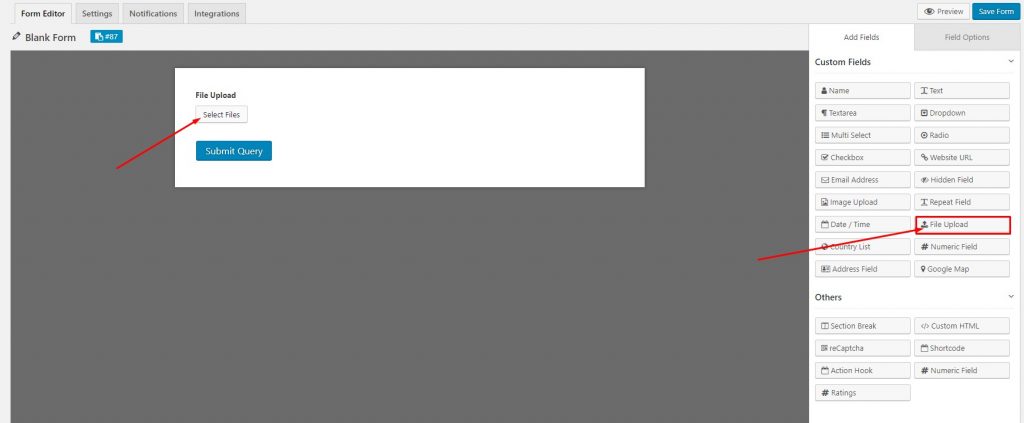
2. File Upload field created by clicking on or dragging the File Upload custom fields.

3. You can edit the File Upload feature from the Field Options by clicking on Edit.

You will see the following options under Field Options:
- Field Label: This is the text that you will see in the form of the Email field. You can put any text here that helps to understand the use of this field.
- Meta Key: You can customize the meta key from here. However, a meta key is automatically generated according to the field label that you provide.
- Help Text: You can put a help text for this field to make the form user-friendly.
- Required: This option allows you to make this field either required for submitting the form or optional.
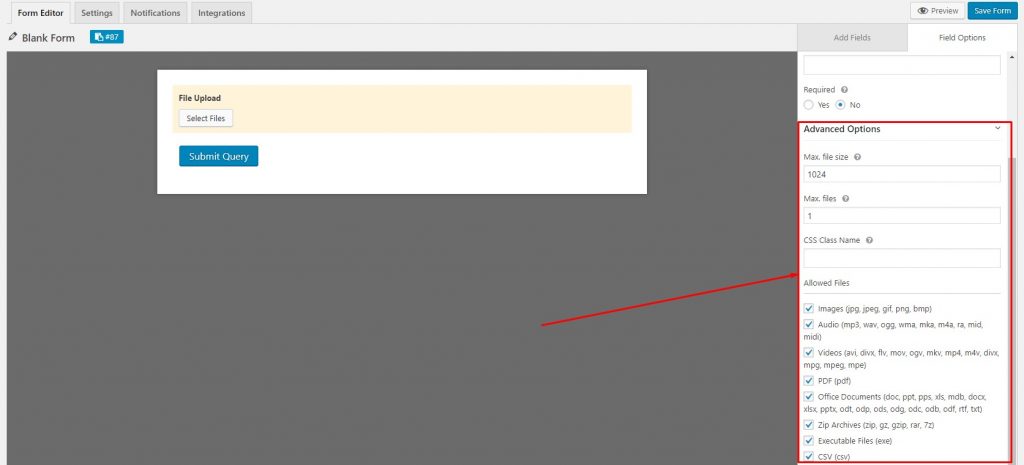
4. Advanced Options

You will find the following features under Advanced Options:
- Max file size: It allows you to set the uploaded file size limit in KB. (please note this may be overruled by your hosting provider’s rules)
- Max files: It lets you set the number of files that can be uploaded for a user.
- CSS Class Name: It lets you provide a container class name in the field.
- Allowed Files: This option lets you select the type of files that you would allow any user to upload with the form.
For any further questions, contact our support team.
