Using the weForms contact form plugin you can easily integrate your Trello boards and lists to your WordPress site. Your users fill out the form, submit the query, and via the integration, a Trello card is created on the board that you choose.
With this document, using just a few easy steps, you will be able to better automate your workflows between Trello and your WordPress site.
Configuration
- With weForms Pro installed on your WordPress site, you can integrate Trello. First, you have to activate Trello. Go to wp-admin > weForms > module. Activate Trello using the Enable button as shown below. Please note that you need to have weForms Business or Developer package in order to use the Trello integration.
- Next, navigate to: wp-admin > dashboard > weForms > Settings. If you already have a Trello account, you will see Authorize Trello button. If you do not, then sign up for Trello and then come back to this step.
- You will be asked to authorize Trello by signing in to your account from a pop-up modal window. Often if you are already signed in in your current browser window, it will bypass the modal window and immediately connect.
- If the window does appear, click on Allow.
- Next navigate to: weForms > all forms > blank form > create a new form or open an existing form.
- Click on the Integrations tab. And activate the toggle button for Trello.
- Click on the Update button beside each field to obtain the Trello elements.
- Again, click on the Update button. Select the Trello List for subscription and members:
- Click on the Update button. Select the Trello team members to who you want to assign the cards to.
- Fill out the Card Name and Card Description fields.
- Hit Save Form on the top right and click on preview. You will see the form through which you can create a card in Trello. Publish the page using the given shortcode.
View after form submission

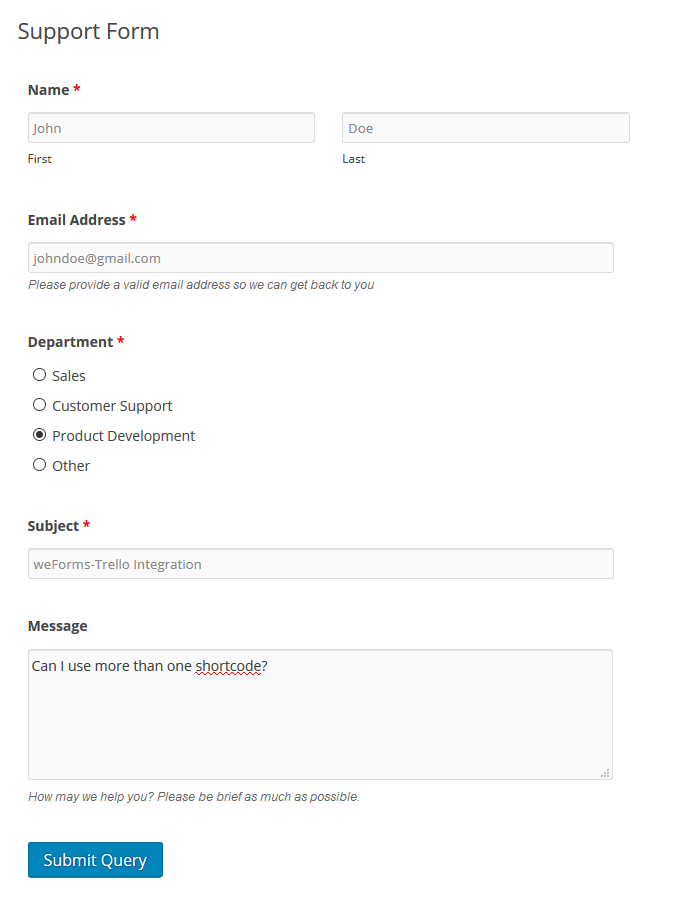
Users need to fill out the form from the web frontend and hit submit button. This creates Trello cards when a user submits a form. Admins will be able to view the cards on the board/list with which they integrated the form.

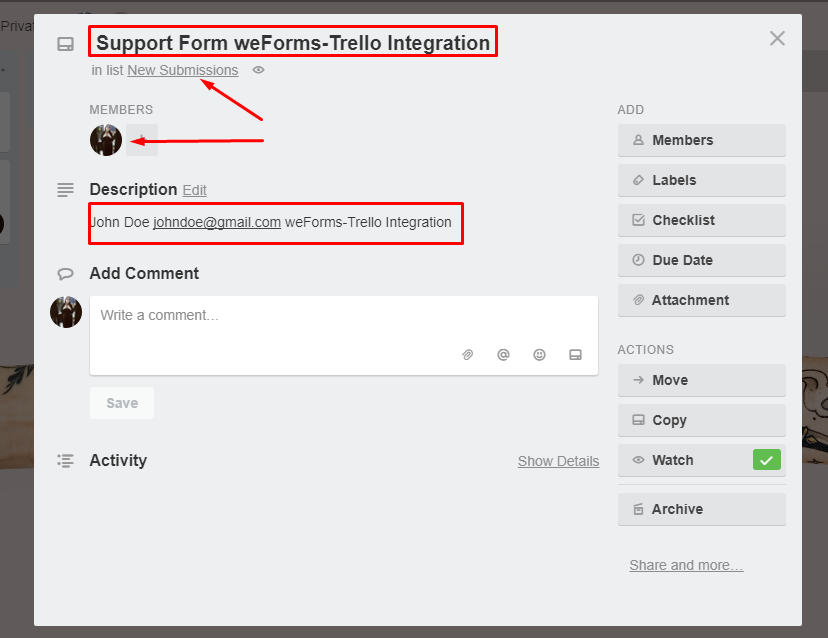
Data that has been submitted through forms by the subscribers will show up on the card. Therefore, every form submitted results in a new card on the specified board.
As you can see below, the Trello card name has been integrated with {form_name} and {field:subject} shortcodes of the respective form fields, as chosen in the Integrations tab. Similarly, notice that the card description has been integrated with the {name-full:name}, {field:email}, and {field:subject} shortcodes. In other words, it has taken the data from those form fields.
For instance, this card in the screenshot below is specified in the Tutorial board, so it shows up there once the subscriber submitted a query.

In conclusion, your weForms Trello integration is active, creating Trello cards with every submission. This will be helpful in your workflow. Above all, you don’t need to worry about any missed tickets.
