Connecting Sprout Invoices with weForms WordPress Contact Forms is a breeze. It will allow you to automate your estimating and invoicing workflow. This integration allows you to map form field entries into Sprout Invoices. Mapping form fields will dynamically create estimates and invoices for your customers. This happens when the visitor submits the form. Sprout Invoices offers many different payment options out of the box, making it easy for you to get paid.
Getting Started
To connect weForms to Sprout Invoices, you will need to download the free version of Sprout Invoices. You can get this from WordPress.org.
You may want to consider purchasing a premium Sprout Invoices plan to unlock more payment options and features! To purchase, follow this link to get the best invoicing plugin for WordPress, with a special discount from weForms.
Once you install and activate Sprout Invoices, navigate to the weForms form you wish to connect and open up the integrations tab. You will need to activate the Sprout Invoices card and click into Settings via the gear icon on the lower left.

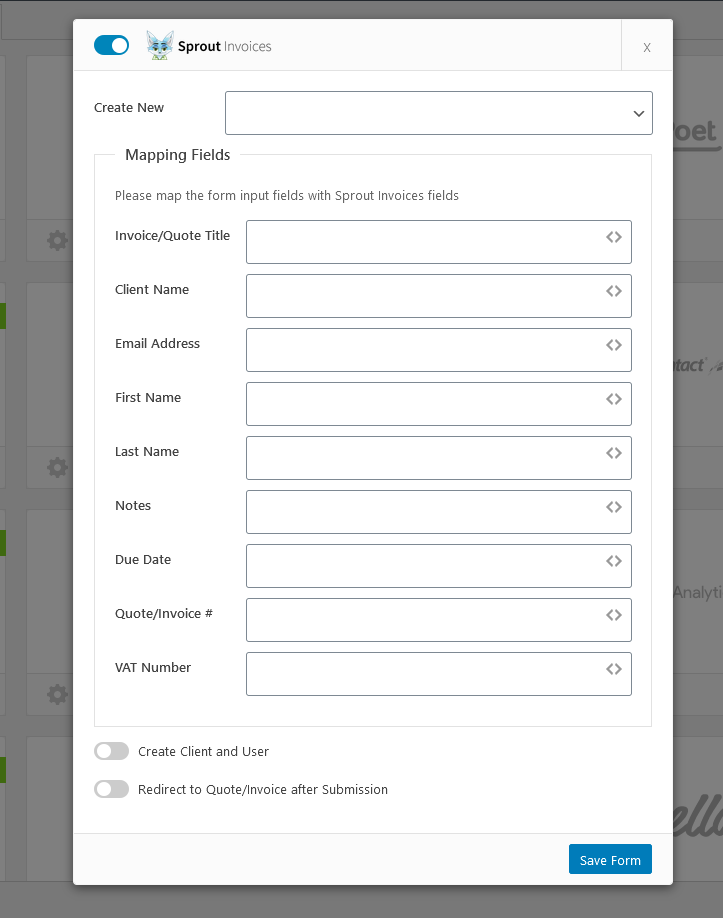
Mapping weForms Fields to Sprout Invoices
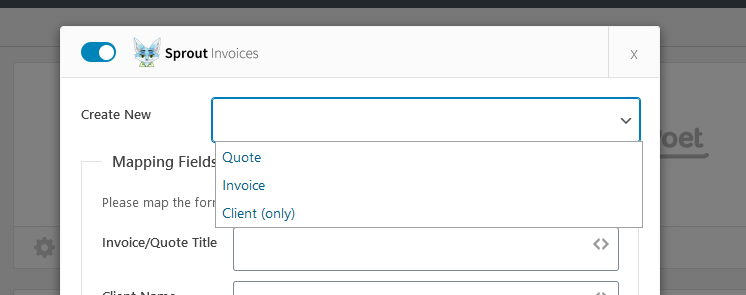
To begin the mapping process, you will first need to use the “Create New” dropdown to choose if you want to create a new Quote, Invoice, or Client.
After selecting what you want to create, you will begin mapping your form to Sprout Invoices. Click the “<>” on each field to view a list of form fields/metadata that can be used.
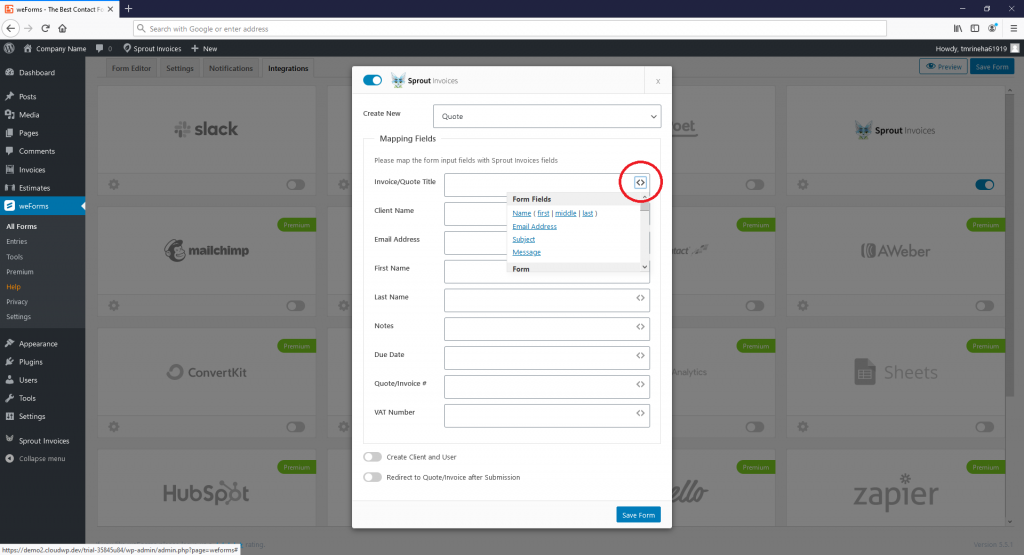
For the best experience we recommend mapping to the following fields:
- Invoices/Quote Title
- Client Name
- Email Address
- First Name
- Last Name
- Notes
- Quote/Invoice #
- Line Items (please see last section on specifics)
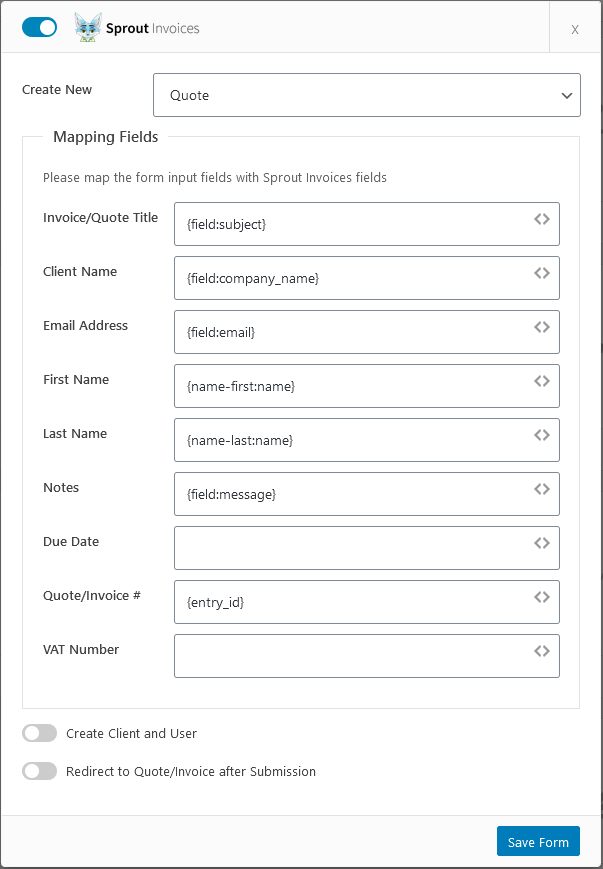
Once all of your desired fields are mapped, you can optionally choose to create a Client and User from the user who submitted the form and immediately redirect the user to the quote/invoice screen after submission. Note: Be sure to save the form!
Viewing Results
With your form mapped to Sprout Invoices and saved, you are now ready to test/use the integration. Add the form to whatever page you wish if you have not done so already.
Once you update your page with the form, fill out the form entry and submit. Depending on your choice of whether you created an estimate or invoice, navigate to the appropriate screen under Sprout Invoices.
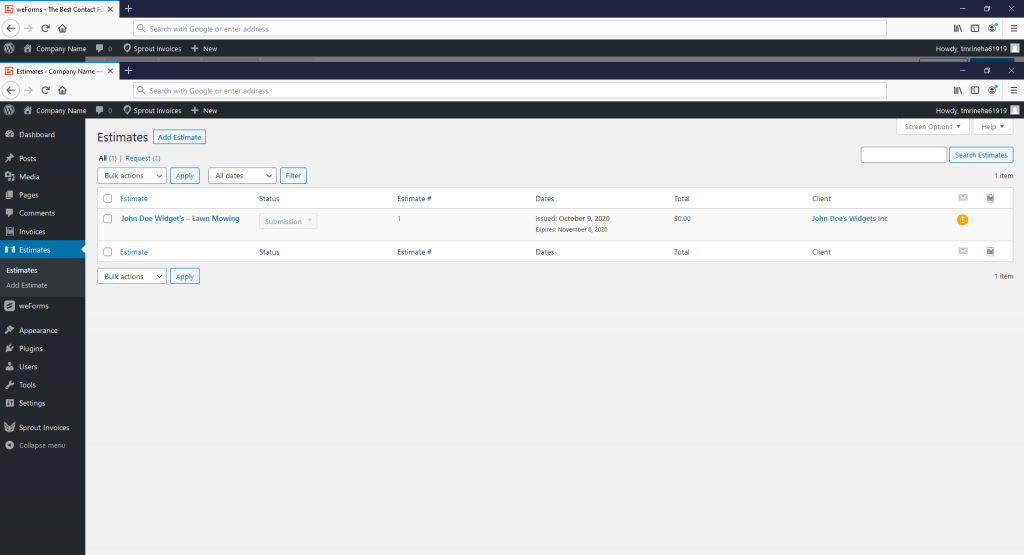
Once inside, you can manage the estimate or invoice as desired. Adjusting status, line items, notes, and more! You can view the document as well.
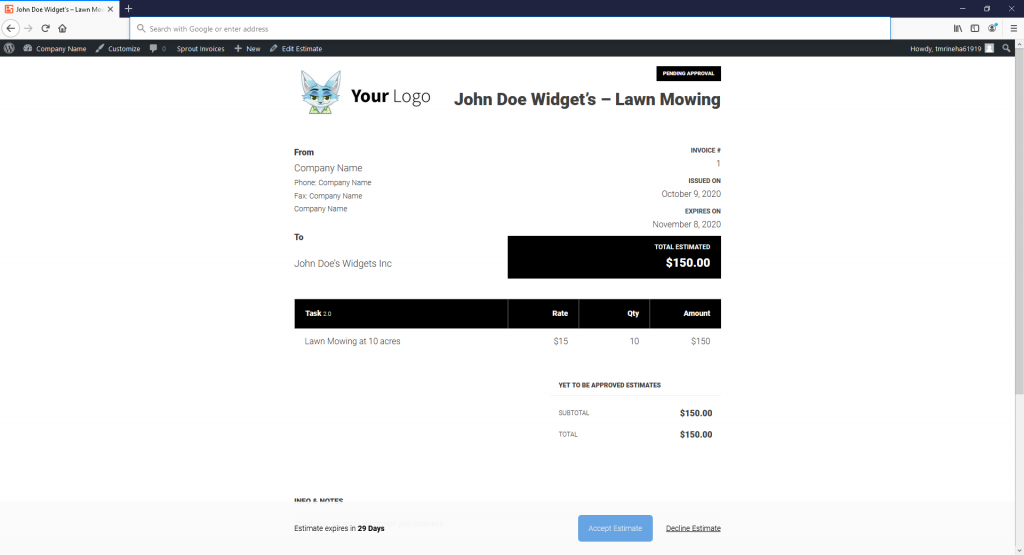
And with that you now have mapped weForms to Sprout Invoices. To learn about more functionality available with the invoicing plugin, head over to Sprout Invoices to see what additional features are available!
Mapping Line Items for your Estimates and Invoices
The Sprout Invoices and weForms integration also allows you to map form fields to create line items. Doing this can allow you to automatically configure costs on an estimate or invoice if you have fixed prices for your services or product.
To map weForms to Sprout Invoices’ line items you will need to make use of the checkbox field.
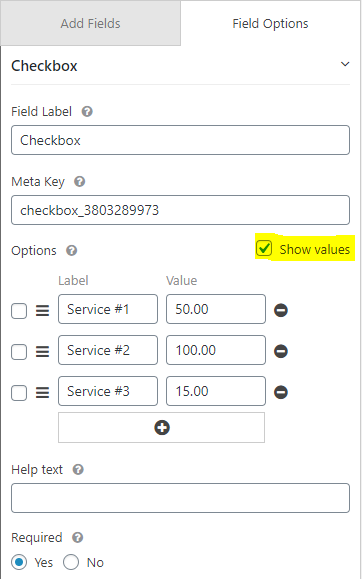
Begin by adding the checkbox field to your form via the Form Editor. On the checkbox options, click Show Values and start adding the labels for each service or product and place the cost in the value column (no need to add dollar signs).
Once you save the form, navigate to the Integrations tab and open up the mapping settings for Sprout Invoices. On the Line Items option, select the Checkbox (or whatever you named the checkbox) field to map.
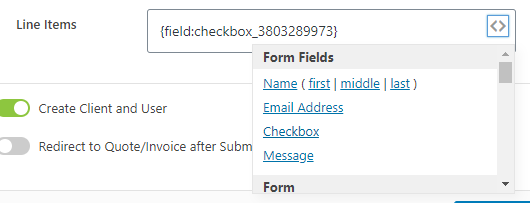
Save the form and the line items will appear after form submission in Sprout Invoices!
